Very Easy Pop-Up Christmas House Card

Hi Everyone,
Thank you for visiting my Blog today! If you follow me you would of saw the Pop-Up Woodland card that i made the other day. This has been so popular and i just want to say 'Thank you' to everyone who has sent me pictures of their version!! I love seeing your makes! I enjoyed making that card and watching the little scene 'come to life'.
My mind has been ticking away thinking what else i could make using the same concept. I decided on this adorable pop-up House card!! It turned out so cute and its even easier than the Woodland Card!!


No dies are required to make this card. I did use dies for my door and windows but you can easily make your own. I only used them because i had them. The Tree, Ginger bread men, sign and presents are stamps. I stamped them, coloured them in then fussy cut them out. I just left a small tab sized piece of card on the bottom so i could fold it and use it to stand the elements up. You can use whatever stamps you have.
DIMENSIONS
POP UP CARD MEASURES 5 3/4" X 11"
SCORE IN THE MIDDLE @ 5 1/2"
MARK THE FOLD LINE 1" FROM EACH SIDE AND MEASURE UP 1" CUT UP BOTH OF THESE PENCIL LINES
CARD BASE MEASURES 6" X 11 1/4"
SCORE IN THE MIDDLE @ 5 5/8"
CARD FOR THE HOUSE MEASURES 4 5/8" X 5 1/2"
MEASURE DOWN 1 3/4" ON EACH SIDE AND MARK
MEASURE THE MIDDLE OF THE CARD AND JOIN THE PENCIL LINES TO CREATE A POINTY ROOF. CUT WITH SCISSORS
Please check out my Youtube video for full instructions. I have added the link at the end of this post.
Until next time.....
Ann xx
EASY Pop-Up Christmas Card! (Folds Flat)

Hi Everyone
Thank you for popping over to my Blog! Today i have the most adorable Pop-Up card that is so simple to make!! How cute has mine turned out!!! I love it. The longest part of this project was gluing all the pieces on, like the trees and little snowflakes etc. I happily sat and glued away though as i really enjoyed making this card.
My mind was also going crazy with all the different types of decorations i could use. Maybe little Houses and Villages etc. Maybe doing some more stamping and adding paper to the background etc. There are so many different ways you can decorate this card.

 |
| The card folds completely flat for posting. |
Below i have listed the Dimensions:
RED CARD BASE MEASURES 11 1/2" X 6 1/2"
SCORE IN THE MIDDLE @ 5 3/4"
WHITE INSIDE CARD MEASURES 11" X 6"
SCORE IN THE MIDDLE @ 5 1/2"
PENCIL MARKS FOR THE POP-UP ARE:
2 CM OR 3/4" FROM EACH SIDE - 4.5 CM OR 1 3/4" MEASURING UP
2.5 CM OR 1" FROM EACH SIDE - 2 CM OR 3/4" MEASURING UP
2 CM OR 3/4" FROM EACH SIDE - 1.5 CM OR 1/2" MEASURING UP
Please check out my tutorial for full instructions. You can find the link at the end of this post.
Until next time......
Ann xx
NO DIE EASY Christmas Book Box Tutorial

Hi Everyone,
Today i am back with a a Christmas version of the 'Spooky Spells' Book Box i made. I have had so many requests to make a tutorial so i have. You can find that on my You Tube channel ( The link for that is at the end of this post). As you no the original Book was made in a Halloween theme, i did think when i was making t that it would look great in a Christmas theme.
I really hope you will have a go at making one. I would like to see more people making my projects as i put so much work into them. It gets very disheartening when people don't attempt to make any. You can email me your pics to positivelypapercraft@gmail.com. If you are a member of my Facebook group you can post the pictures on there.

 |
| The 'original' Book in a Halloween theme. |
DIMENSIONS
YOU WILL NEED A 12 X 12" PIECE OF CARD STOCK CUT DOWN TO 10 1/2" X 12"
SCORE ALL 4 SIDES @ 1 1/2" & 3"
1 PIECE OF CARD STOCK FOR THE FRONT OF THE BOOK MEASURING 4 1/2" X 6 1/4"
1 PIECE OF CARD STOCK FOR THE SPINE MEASURING 6 1/8" X 2 1/4"
I love this little Book Box and i will be most definitely making a few more.
Until next time........
Ann xx
Large Christmas Cracker Box (holds 6 Crackers)

Hi Everyone,
Welcome to my Blog!
Today i have a gorgeous Christmas Cracker project for you. This large box holds 6 Crackers and would make a perfect gift for so many people. The crackers are made from a Cracker die but the box i made myself. Of course you don't have to put crackers in the box, i think it would also hold a bottle of Wine and some Chocolates.


I thought it would be nice to put an acetate window on the front . You can just use whatever shape dies you like for yours. The box has 2 lids, the bottom one i glued on as i didn't want the crackers falling out. I also made a carry handle from Ribbon.
Please check out my Video tutorial. You can find the link at the end of this post.
Until next time......
Ann xx
Beautiful & Easy Christmas Diorama Cards

Hi everyone,
Thank you for stopping by my Blog Today!
I want to share these beautiful Diorama cards with you. I made quite a lot of them and most of them are White, which i think looks so elegant. I think my favourite is the Black & white one. They are very simple to make and you can use most frame die sets. I used a mixture of Ovals & Rectangles but you could also use Circles & Squares, whatever you prefer.
The Snowy hills are just some Border Dies that i have so you don't need specific 'Scene' Dies, just use what you have. I think they turned out so pretty and the great thing is that these cards fold flat for posting!! Here are some more i made.


I also have a tutorial on Youtube so please check it out. I will put the link below.
Until next time......
Ann xx
Easy & Elegant Lumiere Box Tutorial

Hi Everyone,
Today I am back with a beautiful Lumiere Box tutorial. I am totally over the moon with the end result of these, particularly the White Christmas Box!! The picture really don't do it Justice! Its so beautiful. I gave it to my Mum today as a gift & she was thrilled with it. I love the fact that these boxes have a lift off top and also gorgeous Metal feet.


Of course you don't have to use it as a Lumiere, i suppose you could use it to put gifts in or something totally different. The great thing is you can make these boxes for any occasion. As you can see i did a Christmas themed one & also a Halloween themed one. They look stunning with the Tea Lights in.
DIMENSIONS
2 PIECES CARD STOCK MEASURING 8 1/4" X 9 1/2"
SCORE THE LONG SIDE @ 5 1/2"
SCORE THE SHORTS SIDE @ 4" & 8"
LID
CARD MEASURING 5 1/8" X 5 1/8"
SCORE ALL 4 SIDES @ 1/2"
Please check out my YouTube tutorial for full instructions & also links to products i used to decorate my boxes. You can find the link below.
Bye for now
Love
Ann xx
White on White Christmas Cards (Feat KSCRAFT)

Hi Everyone,
I am trying to get back into Blogging again so i wanted to post this beautiful White on White Christmas cards i made last Week. I LOVE White Christmas cards, there is something quite Magical about them i think. They were all made mainly using Dies from KSCRAFT LOVERS STORE store on Aliexpress . They were some gorgeous Design Team dies i received from them.


I hope you like the cards i made and if you click on the video link at the end of this post you can see all the cards in more detail. I will also link to the dies i used as well.
If there is anything i have not listed and you would like to no what it is, please just let me no and i will see if i can find the link for you :-)
LINKS FOR PRODUCTS I USED:
KSCRAFT BAUBLE SHAKER DIE
KSCRAFT OVAL SNOWFLAKES
KSCRAFT DECORATIVE FRAMES
POINSETTIA DIES
Until next time..............
Love Ann xx
Cutesy Christmas Shakers!! (FEAT KSCRAFT)

Hi Everyone!
I am back with another Tutorial!
Today i have the most CUTEST Christmas shaker cards in the world!! OMG i love how they turned out and i am rather addicted to making them! How cute are these?????????
This adorable Raccoon die is from KSCRAFT LOVERS store on Aliexpress and you can buy him HERE
I also used a gorgeous pair of baby Deer dies, they are so cute!!! You can also buy them HERE
I will most definitely be making more of these as they are just so cute and really fun to make. I just sat for a couple of hours in my own little world and made thsese gorgeous Christmas cards.


Please check out my Youtube tutorial and i will show you how i made these gorgeous Christmas Shaker Cards!
You can find the link below :-)
Until next time........
Love Ann xx
#4 Christmas Week - Adorable & Fun Chimney Gift Box!

Hi Everyone,
Welcome to my Blog & project #4 of my Christmas Week! Today i have such a cute & fun gift box for you. Its meant to look like a chimney & i think Kids would love this! You could fill it with lots of sweets or anything you fancy really. It was great fun to make & decorate and is very easy to.

To get the brick effect on my chimney i used a Brick embossing folder. Stampin Up! used to have one but its now retired. I bought mine from Craft Stash so i am sure you can pick one up if you don't have one. I used dazzling diamonds glimmer paper for the snow.
In case you missed yesterdays project, #3 Christmas week Easy pop up tree card, i have popped the link below so you can check it out.
Pop Up! Tree Card Tutorial
DIMENSIONS
SOFT SUEDE CARD FOR THE BOX MEASURES 10 1/2" X 5 1/2"
SCORE THE LONG SIDE @ 2 1/2", 5", 7 1/2" & 10"
SCORE THE SHORT SIDE @ 3"
SMOKY SLATE CARD FOR THE LID MEASURES 3 9/16" X 3 9/16"
SCORE ALL 4 SIDES @ 1/2"
SOFT SUEDE CARD FOR THE CHIMNEY POT MEASURES 3 1/2" X 2"
SCORE THE LONG SIDE @ 3/4", 1 1/2", 2 1/4" & 3"
SCORE THE SHORT SIDE @ 3/4"
STAND/BASE OF THE BOX MEASURES 3 X 3"
I hope you will have a go at making this adorable little box. Please check out my YouTube Tutorial which has step by step instructions on how i made the box. I will put the link at the end of this post.
Until tomorrow.....
Bye for now.
Ann xx
#7 Festive Friday 3 Sided Heat Embossed Christmas Cracker
Hi Everyone,
Welcome to my blog & project number 7 of my festive Friday series.
How the weeks are flying by!! I can not believe that it will be Christmas in about 4 weeks!! I have nearly finished all my Christmas shopping so i am very happy about that :-)
So today i have some very pretty Christmas Crackers that only have 3 sides! I thought it was something a little different to the norm. I have also stamped my crackers and heat embossed them. This is a great way to create your crackers the way you like them. These would be great for gifts or just putting on the Christmas table. I hope you like them.


With the gold cracker i punched the ends with the ticket tear border punch. I really like the way that turned out. Also, you could change the measurements if you would like to have your cracker bigger or smaller.
You will need the envelope punch board for these & if you do not have one....you really do not know what you are missing!!! There really is know end to what you can make with it.
I love these crackers & as i said before, i think they are a bit different having only 3 sides.
DIMENSIONS
Whisper white card measuring
5" x 8" OR 12.8 cm x 20.3 cm
Score the short side @ 1 1/2", 3" & 4 1/2" OR 3.8 cm, 7.7 cm & 11.5 cm
Score the long side @ 1", 1 1/2" & 2" on both ends OR 2.5 cm, 3.8 cm & 5 cm
Please find all the products i used listed below & also the link for my YouTube tutorial.
I will be back tomorrow with Stamp set Saturday!
Love
Ann xx
Welcome to my blog & project number 7 of my festive Friday series.
How the weeks are flying by!! I can not believe that it will be Christmas in about 4 weeks!! I have nearly finished all my Christmas shopping so i am very happy about that :-)
So today i have some very pretty Christmas Crackers that only have 3 sides! I thought it was something a little different to the norm. I have also stamped my crackers and heat embossed them. This is a great way to create your crackers the way you like them. These would be great for gifts or just putting on the Christmas table. I hope you like them.

With the gold cracker i punched the ends with the ticket tear border punch. I really like the way that turned out. Also, you could change the measurements if you would like to have your cracker bigger or smaller.
You will need the envelope punch board for these & if you do not have one....you really do not know what you are missing!!! There really is know end to what you can make with it.
I love these crackers & as i said before, i think they are a bit different having only 3 sides.
DIMENSIONS
Whisper white card measuring
5" x 8" OR 12.8 cm x 20.3 cm
Score the short side @ 1 1/2", 3" & 4 1/2" OR 3.8 cm, 7.7 cm & 11.5 cm
Score the long side @ 1", 1 1/2" & 2" on both ends OR 2.5 cm, 3.8 cm & 5 cm
Please find all the products i used listed below & also the link for my YouTube tutorial.
I will be back tomorrow with Stamp set Saturday!
Love
Ann xx
#3 Christmas Week - Easy Pop Up Christmas Tree Card

Hi Everyone,
Welcome to my Blog & project #3 of my Christmas Week Series! I hope you are enjoying all the projects so far, i still have a few more great ones lined up for you.The last project will be on Sunday 2nd December.
I was browsing through Facebook a couple of weeks ago and i came across this type of card. I really can not remember who it was that showed it, i just know that it was a craft hack of some sort. Like a 3 minute craft video type of thing. If i see it again i will put a link to the video. I just thought it was so cool and it also looked pretty easy to make.


I love stamping so i decided to hand stamp the inside of my card with cute Christmas Stockings. I think it looks really sweet & also quite vibrant. I used the hostess set which is called Hung With Care.
 |
| Hung With Care (Hostess Set when you spend £150 or more) |
DIMENSIONS
THICK WHISPER WHITE CARD BASE MEASURING 7 X 10" SCORE IN THE MIDDLE AT 5"
4 PIECES GREEN CARD MEASURING :
1 X 8"
1 1/2" X 8"
2 X 8"
2 1/2" X 8"
SCORE ALL 4 PIECES ON THE LONG SIDE AT EVERY 1/2"
DSP FOR THE FRONT OF THE CARD MEASURES 6 7/8" X 4 7/8"
Please check out my Youtube tutorial for full instructions. I really hope you will have a go at making one of these! It was great fun and i will be making them for my family this year.
Until tomorrow.....
Love Ann xx
No Die Easy Tree Fold Card

Hi Everyone,
Thank you for stopping by my blog today. I think many of us always have a last minute Christmas Card to make. Today i have one that would be perfect & i am sure they will think its so cool! As i state in the title, this card requires no fancy dies just a pencil, Ruler & some Scissors.

I decorated the front of my tree with pretty gold star gems, of course you can use whatever you have. I suppose you could even stamp or do some heat embossing on the Tree front, the choice is yours.

As you can see from the picture above, i used some Gold glitter paper to glue behind the main Tree. Again, you can use whatever you have. This was simple to do as i just drew around the Tree shape and cut it out with scissors. Twine was used to keep the card shut.
DIMENSIONS
CARD MEASURING 11 1/4" X 5 3/4"
SCORE THE LONG SIDE @ 1 1/2", 3 1/2", 7 1/2" & 9 1/2"
WHITE CARD FOR YOUR STAMPING/MESSAGE MEASURING 3 3/4" x 5 1/2"
Please make sure to watch my YouTube Tutorial as this will give you step by step instructions of how to put this card together. You can find the link at the end of this blog post.
I really hope you like this card and will give one a try. Its really pretty simple to make. Another great thing is that you can fit this card into a normal envelope as it folds pretty much flat for postage. It also stand up perfectly so you can display it on your Fireplace etc.
Until next time.....
Love Ann xx
Tiny Adorable Diorama Card

Hi Crafter's
I am back with another project for you. I hope you like this one as much as i do! Its just so sweet. You can make them for any occasion, not just Christmas. I think these would make cute Children's cards. They really are not hard to make and i love the way they turned out.
I used a decorative Die to cut my windows in the card. You can of course use any dies you like, Circles, Squares, ovals the choice is yours. I think it would look great no matter what shape you choose.


To make this card you will need:
2 pieces card measuring 4" x 3 1/4"
2 pieces measuring 4 1/2" x 3 1/4" score the long side @ 1/4" on both ends
2 pieces card measuring 1 3/4" x 3 1/4" score both pieces on the short side @ 1/4" on both ends.
To make the snow effect ground i used some glitter cardstock and some edge dies that i have. You could also just cut the card with scissors to make a 'snow' effect.
The cute dies i used are Tim Holtz Tiny SnowGlobe dies. I bought mine from CraftStash. Here is the LINK if you wish to purchase them. They really are so cute & perfect for mini cards like these.
Please remember to check out my YouTube Tutorial for this project. I have posted the link at the end of this blog post.
As i stated in the title, the great thing is that this card folds totally flat for postage so you can fit it in a normal envelope.
I hope you have enjoyed my project for today. I will be back again on Friday with another!!
Love Ann xx
Easy Shaker Style Christmas Ornaments

Hi Everyone,
I told you i would be back :-) I am so excited to bring you my first project as a 'free' Woman haha. I have lots of great tutorials coming up & i am so happy most of you are staying with me :-)
I am kicking my first project off with these really cute photo ornaments. I was shopping in B&M the other day when i came across them. They were only £2.49 for 4. You get 2 circles & 2 star shapes. They are designed to hold pictures but i wanted to decorate mine a bit more.

They are so easy to make and you could add sequins, glitter or faux snow like i have. I picked a large bag of faux snow up from my local pound shop. You get a picture already inside the ornament, don't throw it away until you have drew round it, this will give you a template for whatever paper or card you want to put inside.
The red Truck is a stamp set that i bought from http://www.craftstash.co.uk i stamped it out using Tuxedo Black ink then i coloured it in with alcohol markers. The Trees are die cuts and the background is glitter card.
The other ornament was decorated with a cute Ginger Bread Man die.
These would make very inexpensive gifts or you could just make them for your own home. I hope you like them :-)
Please check out my YouTube tutorial which you can find listed at the end of this blog post. I will be back again next week with lots more tutorials.
Love Ann xx
Easy Acetate Tags With Metallic Edging

Hi Everyone,
Welcome back to my Blog!!
Today i have such a sweet & easy Christmas project for you. One of the things that make it so adorable is the Signs Of Santa Stamp set & matching dies from Stampin' Up! I love this set & i think it has to be one of my all time favorites!! I know i will use this year after year.
You may remember that a while back i did a swap with one of my lovely Team members (Sue Bishop) In the swap she gifted me 2 metallic markers in Gold & Silver. I also said that i had some ideas what i wanted to use them for. Well i have finally got round to using them!


I cut my tags from Acetate and ran the marker down the sides, its that simple & i think the effect is great. I used a ruler to help me make a straight line with the marker. You may already have some metallic markers at home but if not they are pretty easy to find. I am sure Sharpie make them to.
I used Stampin' Up! Stitched Shapes dies to make my tags but you can use whatever you have. I chose a square as i new it would be easy to use my ruler as a guide.
I think these little tags are so cute and you could also make them to hang on your Tree. They don't have to be Tags at all. I hope you will give them a go and they really are very simple to make & great fun.
Please remember to use my Hostess/rewards code if you shop with me & your order comes to less than £150. This will allow me to enter you into my customer rewards club & i will send you out a FREE Stampin' Up! product.
If you have any trouble using the code please just let me know & i will help you. My contact details are at the top of this blog.
I have also linked my YouTube Tutorial at the end of this post if you would like to watch it.
Until next time.....
Love Ann xx
Gorgeous Triangle Star Top Gift Box

Hi Crafters,
Thank you for popping over to my Blog on this fabulous Friday!! Today i have another Festive themed project for you & i think you will like it. First off, i have to say that this is not my idea. I CASED this from one of my lovely Team members, Andrea Parr. Below you will find the link to Andrea's Blog:
http://www.craftylittleblog.com/
Andrea made this gorgeous little box earlier this year & i think its fab! It really is very quick & simple to make & to be honest its really large. You can fit loads of little gifts or treats in there for Christmas. I thought it would be a perfect festive project as the top has a 'Star' effect closure. I emphasized mine with some Silver foil card. You could use Gold or even glitter paper. The choice is yours.


To make my box i used Shaded Spruce Card, Under the Mistletoe Designer Paper, Labels to love stamp set & The everyday label punch. I just love the colours of this box.
 |
| 144967 Labels to love |
 |
| 144668 Everyday label punch |
 |
| Under the Mistletoe designer Paper 146921 |
Please remember to add my rewards club code to your order if you spend less than £150 (You can find the code in the sidebar on the right) This will enter you into my customer rewards club & i will send out some FREE gifts for shopping with me.
SHOP ONLINE NOW
DIMENSIONS
CARD MEASURING 8 X 11"
SCORE THE LONG SIDE @ 3 1/2", 7" & 10 1/2"
NOTCH THE LONG SIDE TOP & BOTTOM @ 1 3/4", 5 1/4" & 8 3/4"
SCORE THE SHORT SIDE @ 1 1/2", 5" & 6"
3 X DESIGNER PAPER MEASURING 3 1/4" X 3 1/4"
Please check out my Youtube tutorial, you can find the link at the end of this blog post.
Until next time......
Love Ann xx
Easy Fold Flat Santa Gift Bag

Hi Everyone,
Thank you for stopping by my Blog today.
I am back with another cute Christmas project. This time i have a lovely fold flat Santa style gift bag. Its really easy to make & you could make them up well in advance & store them all flat until you need them.
These are just so much better than shop bought gift bags & in my opinion so much better quality to. They take know time to make & i am sure whoever you gift them to will love them!

To make my bag i used one sheet of A4 card stock ( 8 1/4" x 11 3/4") Of course if you use 12 x 12" card you could make your bag bigger. You will be surprised at how much you can fit into this sweet bag. I added a sweet sentiment from the Timeless Tidings stamp set & also a couple of Christmas Jingle bells.
DIMENSIONS
REAL RED CARD MEASURING 8 1/4" X 11 3/4"
SCORE THE LONG SIDE @ 3 1/2", 5 1/2", 9" & 11"
PARTIAL SCORE @ 4 1/2" X 10"
SCORE THE SHORT SIDE @ 2", 3" & 7 1/2"
BLACK CARD FOR THE BELT MEASURES 3 1/2" X 1 1/2"
 |
| 148936 Timeless Tidings |
Please check out my Youtube tutorial for full instructions which you can find at the end of this post.
Until next time.........
Bye for now
Love Ann xx
#7 Christmas Week - Very Easy Tree Fold Card & Matching Wreath!

Hi Everyone,
Welcome to my Blog & project #7 of my Christmas Week series. I am very sad to say that this is the last project of the series. I hope you have enjoyed it & i hope it has given you lots of ideas & inspiration. I still have lots more gorgeous Christmas projects coming over the next few weeks so make sure you stay watching! In case you missed yesterdays project #6 i have popped the link for it below:
#6 Christmas Week Easy hanging ornament
Today i have 2 lovely projects for you that really are so easy to make. I have a gorgeous and fun Christmas Tree card & also a matching wreath. You could quite easily use up your scraps to make these projects as you only require small squares of paper to make them.

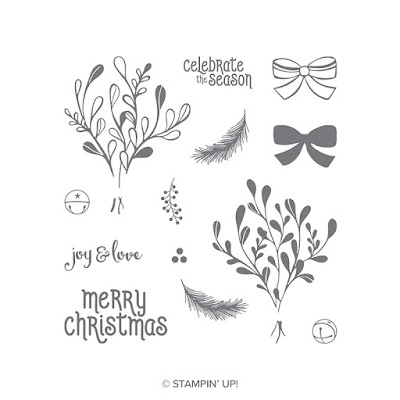
To make my projects i used the gorgeous Under the Mistletoe designer paper from Stampin Up! & also the matching stamp set, Mistletoe Season. You can purchase these items from my 24hr online shop.


Clicking on the above photos will take you direct to my shop.
Please remember if you order is less than £150, please use my hostess/rewards club code. Make sure you add this to your shopping basket page in the bottom left hand corner of the screen. You will then be entered into my customer rewards club and i will send you a FREE gift for shopping with me!
DIMENSIONS
TO MAKE THE TREE CARD YOU WILL NEED 4 PIECES OF DESIGNER PAPER MEASURING:
1 X 3 X 3" OR 7.6 CM X 7.6 CM
1 X 2 1/2" X 2 1/2 OR 6.3 CM X 6.3 CM
1 X 2 X 2" OR 5 CM X 5 CM
1 X 1 1/2" X 1 1/2" OR 3.8 CM X 3.8 CM
TO MAKE THE WREATH YOU WILL NEED 7 PIECES OF DESIGNER PAPER MEASURING
2 1/2 X 2 1/2"
Please check out my youtube tutorial for full instructions. You can find the link at the end of this blog post.
until next time.....
love Ann xx
#6 Christmas Week - Easy hanging Ornament

Hi everyone,
Welcome to my blog & project #6 of my Christmas week. Today i have this really easy & beautiful hanging ornament. I was browsing through YouTube last week & came across a channel called ZIZ Craft. I saw this ornament & thought it looked so pretty.
I made mine with whisper white card & heat embossed it with silver powder. Of course you can make it with coloured card or even designer paper, the choice is yours. I do recommend a hot glue gun to attach some of this ornament together.

In case you missed yesterdays project, #5 Christmas Week Diorama card, i have popped the link down below so you can check it out.
http://www.positivelypapercraft.co.uk/2018/12/5-christmas-week-beautiful-fold-flat.html
DIMENSIONS
TO MAKE THIS ORNAMENT TO NEED 6 PIECES OF PAPER OR CARD MEASURING 3 X 3"
YOU CAN CUT THEM FROM A PIECE MEASURING 6 X 9"
Please check out my Youtube tutorial for full instructions, you can find the video at the end of this post. I have also put the link to ZIZ crafts video.
The stamp set that i used for this ornament is called Mistletoe season by Stampin Up!. You can purchase that & any other supplies from my 24hr online shop.
Bye for now
Love Ann xx


Please you show me where to make the cut lines on the boxes of the advent calendar
ReplyDeletePlease
Your work is amazing! Thank you for sharing.
ReplyDeleteAnn, I love your projects & how you explain the steps. I am making an advent calendar using toilet paper rolls cut in half and glued to cardboard that I painted then coated with mod podge. I will put a goodie in each, then cover with wrapping paper & add a number on top. My grands will punch through the top each day to retrieve the goodie. I wonder if that will work or if there is a better way for the top? Do you have any projects like this I can see?
ReplyDelete