Monday 23 March 2020

Simple & Adorable 'Bowling' Style Gift Bag


Hi Everyone,
Thank you for stopping by my Blog today.  I hope you are all staying safe & well.
Today i have a very simple Bowling gift bag for you. I was browsing Instagram a few days ago & i saw a post of a bag like this. It was by a paper crafter called 'Mommy nd me crafts' . She said it was a cut file that she purchased. Straightway my brain was working lol thinking if i could make it myself without a cut file. So here it is :-)


All you need to make this bag is 4 circles that measure 4 1/2" and obviously paper & card. Its super easy to make & it just looks so cute! I hope you will give it a try & you can find the rest of the measurements below.

PATTERNED PAPER MEASURING 8 1/4" X 11 3/4"
SCORE THE SHORT SIDE @ 1/2" ON BOTH ENDS

CARD STOCK FOR THE BAG CLOSURE MEASURING 7 1/4" X 5 1/2"
SCORE THE LONG SIDE @ 1"
PATTERNED PAPER MEASURING 7 1/8" X 5 1/4"

MY HANDLE & DECORATIVE PIECES MEASURED 1" WIDE

Thank you & i will be back on Wednesday with another tutorial.

Love Ann xx


Saturday 21 March 2020

Beautiful Gift Box For The Bouquet Envelope Card


Hi Everyone,
Thank you for popping by today. As promised from yesterday, i have come back with a tutorial for a gift box. This is a very large box and will require 12 x 12" card stock. I am really pleased with how it turned out & because i wanted it to be large and quite deep, i have had to make the walls of the base separate from the rest. You will get what i mean when you watch the tutorial.


I also stated in the video that i will put measurements for a shallower box as i have made mine 2" deep to accommodate for the flowers. You may not want yours so deep, i suppose it depends on how many flowers you put in your envelope.

Please find the measurements below and also the tutorial at the end of this post.

CARD FOR THE LID MEASURES 11 5/8" X 8 5/8"
SCORE ALL 4 SIDES @ 3/4"
OR
29.5 CM X 21.9 CM
SCORE @ 1.9 CM

CARD FOR THE BASE MEASURES 7 X 10"

2 PIECES OF CARD MEASURING 10 X 4 1/2" , SCORE THE SHORT SIDE @ 2" & 4" ON BOTH PIECES

2 PIECES OF CARD MEASURING 7 X 4 1/2" SCORE BOTH PIECES ON THE SHORT SIDE @ 2" & 4"
OR
17.7 CM X 25.4 CM
SCORE @ 5 CM & 10CM

PATTERNED PAPER FOR THE TOP MEASURES 9 7/8" X 7"
OR
25 CM X 17.7 CM

IF YOU WANT A BOX BASE THAT IS ONLY 1 1/2" DEEP THEN HERE ARE THE MEASUREMENTS
7 X 10 FOR THE BOTTOM
2 PIECES MEASURING 7 X 3 1/2
2 PIECES MEASURING 10 X 3 1/2" ]

SCORE @ 1 1/2 & 3" ON ALL 4 PIECES ON THE SHORT SIDE

Thank you
Love Ann xx


Friday 20 March 2020

Beautiful Flower Box Card


Hi Everyone
Thank you for stopping by my blog today. Its been a few days since i posted anything. Everything is up in the air at the minute due to the virus. I am trying to keep my schedule going but i must admit i have been struggling. I can not help feeling very worried & helpless at the moment. My Daughter has been very poorly with Flu so the first few days i was worried sick as we thought she may have the virus. This lead to us having to isolate for a while but since then its been announced that people with low immune systems etc have to self isolate anyway. Me & my Daughter both fall into this category as we are both asthmatic. Its just like a really bad nightmare! I hope you all stay safe & lets pray this is over very soon.

I hope my post cheers you up a little bit today. That is one of the reasons i went for all these beautiful Flowers. Some of them are even made by me! I find is so relaxing making flowers & i think we all need a bit of that at the minute. To be honest i am not sure what you call these type of cards, i have been meaning to make one for over a year but never got round to it. It would be perfect for Mothers Day i think.


If i get a chance, i will do a tutorial either later today or tomorrow for a matching gift box. A box would be a perfect way to give this beautiful creation. Keep yours eyes peeled for the tutorial. I also said in my video that i may do a tutorial for the flowers i made. They are so beautiful & quite addictive.

Please find the measurements below for this project.

CARD STOCK MEASURING 9 1/2" X 9 1/2" 

USING AN ENVELOPE PUNCH BOARD, PUNCH & SCORE AT 3 3/4" & 4 3/4" ON ALL 4 SIDES. 

PLEASE SEE THE VIDEO ON HOW I GOT THE SIZES FOR THE PATTERNED PAPER.

I will be back again very soon with another video. Please take care & stay safe.

Love Ann xx


Sunday 15 March 2020

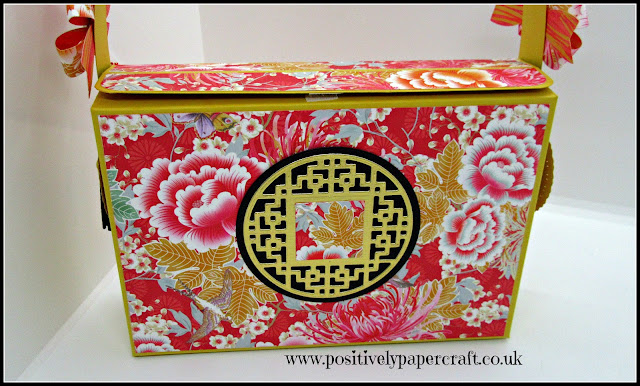
No die Oriental style handbag/Giftbag

Positivelypapercraft Handbag Gift Bag


Hi Crafter's
I am back with another tutorial! I have been so busy the last few days and not feeling 100% if i am honest so i did not get my usual Friday & Saturday video out. Not to worry, i am back now. I hope you are all well and managing to carry on as normal with all the craziness!!
Today i have this beautiful Oriental style Handbag for you. I did actually make this bag about 2 years ago. Well i made 2 versions of it, a small one and then a larger one. I thought it was worth doing it again as its very simple to do and looks great. I hope you like it.

Positivelypapercraft Handbag


I have no idea what the paper pad is called as i must of used the front cover for something. I do no that its a First Edition Pad. Its beautiful and is very much an Asian style paper pad. I had a view Oriental style dies so i thought they would go really well with with the paper. Plus, its made with A4 card as well.


Below you can find the measurements in imperial and metric.

2 X A4 CARD
SCORE THE LONG SIDE @ 1" & 2" ON BOTH ENDS
SCORE THE SHORT SIDE @ 1", 2" & 7 1/4"
DO THIS ON BOTH PIECES OF CARD
OR
2.5 CM , 5 CM & 18.4 CM

2 PIECES OF CARD FOR THE INSIDE POCKETS MEASURE 9 5/8" X 3 1/2
SCORE THE LONG SIDE @ 1" ON BOTH ENDS
SCORE THE SHORT SIDE @ 1"
OR
24.5 CM X 8.8 CM
SCORE 2.5 CM

MAKE YOUR PAPER 1/8" SMALL FOR THE FRONT , BACK AND THE POCKETS

Please check out my video which will be listed below.

Thank you

Love Ann xx


Wednesday 11 March 2020

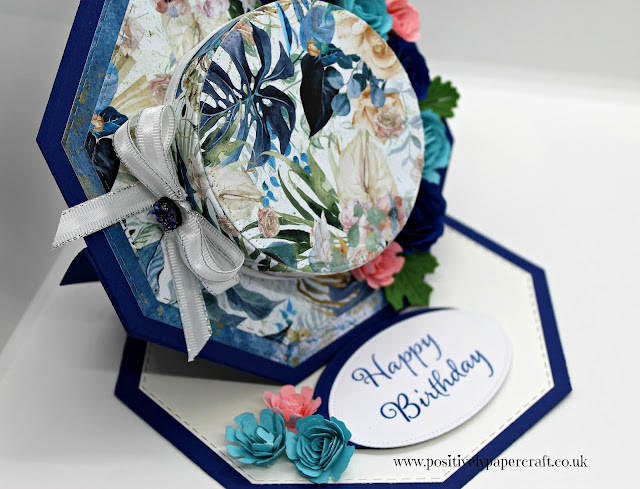
Beautiful Octagon Easel Hat & Matching Gift Case

Positivelypapercraft Easel hat card tutorial


Hi Everyone!
I am back today with this beauty!! Another Easel hat card & a matching gift case. I love the colours & the gorgeous paper which is a paper pad from Mintay called Harmony. Its just so beautiful. This time i have made a slightly different hat. I have gone for another Octagon shape using my large dies. I love it & i am so happy with the finished result. I even made all the flowers myself! Big pat on the back for me i think.

Easel hat card & matching gift box


It looks so elegant & it almost has a Tropical feel to it. It took a little while to make but was so worth it. I would be thrilled to get something like this for my Birthday! This one is for a friend who's Birthday is coming up soon. I really hope she likes it.

Bonnet card tutorial


If you follow me you will see that this is made in the same way as my Octagon Handbag & Vanity case. The Easel card is made in the same way as the two others i have done. I just thought i would share this one with you & we can always use inspiration from time to time.

Please make sure you check out my Youtube tutorial. I will put a link to the video at the end of this post.

Thank you for stopping by & i will be back with another video on Friday.

Bye for now

Love Ann xx


Sunday 8 March 2020

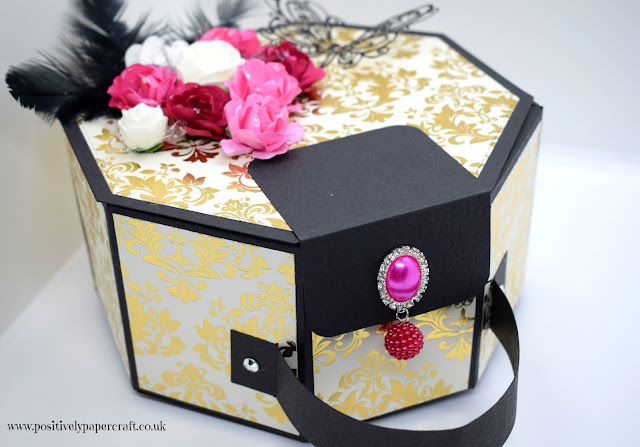
Beautiful Hexagon Vanity Style Case

Positivelypapercraft Hexagon vanity style case


Hi Everyone,
Thank you for stopping by my Blog Today. I hope you are all having a lovely Weekend.  If you watched my Hexagon Handbag tutorial the other day, you will remember that i said i have another idea with the Hexagon Dies. Well here it is!! A gorgeous Vanity style case. I am really pleased with the result and it would be great to gift some special items for someones Birthday etc.


As you can see in the picture above i added some large silver gems which act as 'Feet'. I did show you in my video but i still have not got the hang of my new Camera so the video cuts off again lol. Sorry, i will get the hang of it soon. I also forgot to put my faux Mirror inside. Its just some Mirri card that i die cut and glued it on the inside of the lid. It just looks really sweet.

As i said in the Handbag post the other day, its hard to give measurements as you may be using different size Hexagons to me. If you just measure them they way i show you in my tutorial you should be fine. I did make the depth of my Case 3 1/2". Make your card 4 1/2" as you need to score each end at 1/2".

To decorate my case i added paper/Foam flowers, Black feathers and a die cut Butterfly. I hope you will try this Case, its so easy to make and really does look stunning. I will put the link to my tutorial at the end of this post.

I will be back on Wednesday with another video.

Love Ann xx


Friday 6 March 2020

Gorgeous Hexagon Handbag-Any Size!

Positivelypapercraft Hexagon bag tutorial


Hi Everyone,
Thank you for popping by my blog today. I am back with a beautiful Hexagon Handbag Gift bag. Its so easy to make and you can make it any size you like. I have used Hexagon dies so if you have large or small it will still work. I hope you like it and will give it a go.


Hexagon Handbag tutorial, positiveypapercraft


I had quite a few idea for this method i came up with but no doubt i will share some stuff with you in the next week or so. Basically all we are doing it making our sides & base fit the size of our Hexagon! Super simple as all the sides measure the same. It reminds me of an old style Bag or even a vanity case of some sort.

As you may have different size hexagons than me, its not really beneficial for me to list the sizes i used. I can tell you that i made my Bag 2" deep so the width of my card for the sides was 3" as i scored both ends at 1/2". Just follow that same principal for whatever size hexagons you choose to use.

Please watch my Youtube tutorial as i explain it step by step and its very easy to follow. I will link the video at the end of this post.

I will be back tomorrow with another video.

Love Ann xx


Monday 2 March 2020

Personal Attacks are not welcome!

Hi everyone,
I feel like i need to make this post today as some of you may know i have been attacked on my YouTube channel for 'copying' other You tubers work/projects etc. I find this so upsetting as its simply not true. If i do use ideas or outright 'CASE' a project i will always say.

In the last 2 weeks i have been attacked 3 times for not crediting people. Very rude comments made by 3 different people. I have no idea why this is happening, maybe because i am using chipboard or making craft room storage??? I have no idea.

Let me get a few things straight, i will not tolerate comments like that, you will be blocked. I find it so upsetting as these people have no idea how hard i work! I put hours every day into my channel as thats what it takes to produce 3/4 videos a week. I charge for nothing and all my content is FREE yet i get accused of copying other people.

I have very little time to watch you tube as i am so busy with my Channel, Blog, Kits, Design Team work and of course my Family. I concentrate on my own channel and not others. If someone makes something and then a month later etc i make something similar then i should be crediting this person??? No i don't think so. If i use anyone's idea i will credit that person, if i don't then i am not, its as simple as that.

Do people not realise that going around saying things like that can seriously effect people and there business and.channel??? I am tired of hearing it so please do not bother coming on to state lies about me. I am big enough and old enough to know that if you use someones idea you need to say. I could get picky and list here a good few times i have NOT been given credit for my work. But i just let it go and got on with it.

These people just ruin it for us creators, so many people have quit for the same reasons in the past. I am not going anywhere as i have worked way to hard to just give up.

I will say the same thing again, if i use someones idea i will credit them in my YouTube description or my Blog.

Thank you

Ann

Sunday 1 March 2020

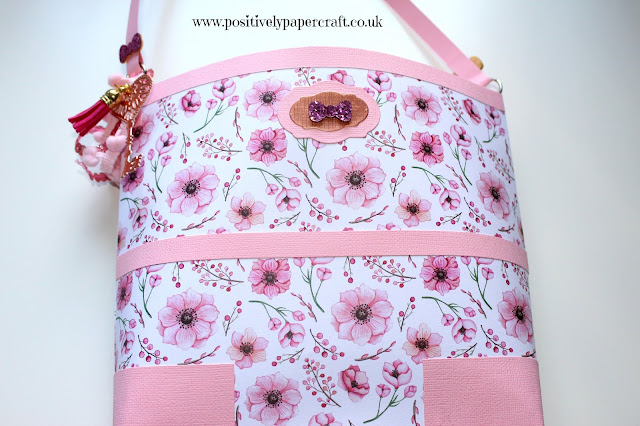
Gorgeous realistic Handbag Gift Bag

Realistic Handbag Tutorial,


Hi Everyone,
Today i have a gorgeous Gift bag that looks very realistic. I am not sure what this style of bag is called but it mat be a messenger bag? or a cross over Bag. They are designed to cross over your shoulder. I have a couple of these bags & i love them. It would be perfect to use as a Gift bag for Mothers Day.

Positivelypapercraft Gift bag tutorial,


I love the colour & also the paper pad i used. Its an old pad i got from the Works but i have know idea what you call it as i lost the front cover. I probably used it to make something! The charms i made & the cute glitter bows make it look so pretty & girly. I hope you will have a go at making this bag, its very simple to do.

You can find all the measurements below in Metric & Imperial. Please make sure you check out my YouTube video which will show you step by step how to make it. If your not already subscribed to my channel please do. It really helps me out and your support means so much to me. Its why i do this :-)

MEASUREMENTS:

1 PIECE PATTERNED PAPER FOR THE FRONT OF THE BAG MEASURING 8" X 11"
SCORE BOTH ENDS ON THE LONG SIDE @ 1/2" 
OR
20.3 CM X 27.9 CM 
SCORE BOTH ENDS @ 1.2 CM 

1 PIECE OF PAPER FOR THE BACK OF THE BAG MEASURING 8 X 10 1/4" 
SCORE BOTH ENDS OF THE LONG SIDE @ 1/2"
OR
20.3 CM X 26 CM 
SCORE BOTH ENDS @ 1.2 CM 

1 PIECE OF PAPER FOR THE POCKET MEASURING 4" X 11
SCORE BOTH ENDS OF THE LONG SIDE @ 1/2"
OR
27.9 CM X 10.1 CM 
SCORE BOTH ENDS @ 1.2 CM 

CARD FOR THE BOX BASE MEASURES 2 1/2" X 9"
SCORE ALL 4 SIDES @ 1/2"
OR 
22.8 CM X 6.3 CM 
SCORE ALL 4 SIDES @ 1.2 CM 

2 PIECE OF CARD TRIM MEASURING 1/2 X 11
OR
1.2 CM X 27.9 CM 

THE HANDLE IS 1/2" WIDE AND CUT IT TO THE LENGTH YOU REQUIRE, MINE WAS 18" SO I JOINED 2 PIECES OF CARD TOGETHER. 

Thank you for stopping by.
I will be back on Wednesday with another tutorial.

Bye for now

Love Ann xx

Year End Clear out!! Grab Some Bargains