Thursday, 31 October 2019

Christmas Cantilever Box Part 1

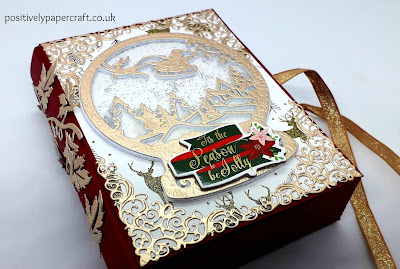
Positivelypapercraft cantilever box tutorial


Hi Everyone!!
I am so excited to be back with some fantastic tutorials in stead of Dies all the time! So lets kick it off with this amazing Cantilever box!! I have made mine in a Christmas theme but you can do yours whatever style you prefer. I LOVE this box & trust me!! Its no where near as hard as it may look!!!

I have split the tutorial into 2 parts, only because i wanted to take my time and make sure you understand how to make this box. I would say the time consuming part is cutting out all the little mats & layers etc. The actual construction of the box is pretty quick and simple. Part 2 will either be on tonight or tomorrow.

Positively papercraft box tutorial, Cantilever box,


So below i am going to list the dimensions for part 1 of the tutorial, just the parts i made in that video. I don't want to overwhelm you with measurements and i will get sore fingers from all the typing lol. The rest of the measurements will be on part 2 of the tutorial so there will be 2 Blog posts, Part 1 & part 2.

DIMENSIONS 

BOX BASE:
CARD STOCK MEASURING 11 1/2" X 8 1/4"
SCORE THE SHORT SIDE @ 1 1/2" & 6 3/4"
SCORE THE LONG SIDE ON BOTH ENDS AT 3/4", 1 1/2" & 2 1/2"

DESIGNER PAPER MATS MEASURE:
1 X 6 3/8" X 5 1/8"
2 X  1 3/8" X 6 1/8" 
2 X 7/8" X 5 1/8" 
2 X 5 /8" X 5 1/8" 

BASE LIDS X 2:
2 X CARD MEASURING 5 7/8" X 6 7/8"
SCORE THE LONG SIDE @ 3/4" ON EACH END
SCORE THE SHORT SIDE @ 1" & 1 3/4"

DESIGNER PAPER MATS MEASURE:
4 X 3 7/8" X 5 1/8"
2 X 5 1/8" X 5/8" 
4 X 5/8" X 3 7/8"

CARD STOCK FOR BRAD JOINERS X4
CARD MEASURES 3/4" X 4"

Please stop by for part 2 tomorrow :-)

I will put the link for part 1 video at the end of this post .

Love Ann xx


Cute 4 x 4" Christmas Cards

Easy 4 x 4" Christmas Cards, Simply made crafts,


Hi Everyone,
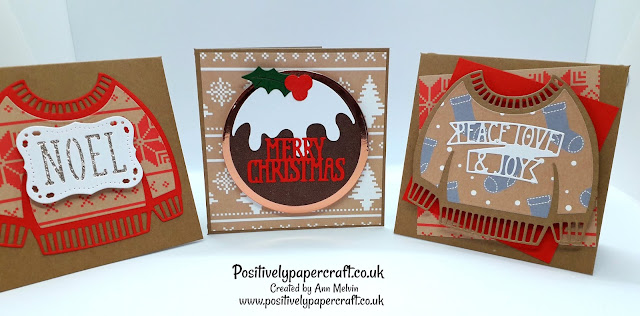
Today i have some really simple but adorable Christmas cards for you! They are all 4 x 4" and are very quick & simple to make . I used Simply Made Crafts Ultimate Tag Die Set You can purchase the from Craftstash if you wish.

All i did was just cut the hole off the top of the tags and you can't tell that they are Gift tags. You get loads of different ones including a Gingerbread Man, Christmas tree, Present, Tag & Reindeer!
They are all perfect to make Christmas Cards & of course you can use them for gifts. You can then have a matching Card & Tag.

I used a 12 x 12" paper pad from Paper Addicts to make the Jumpers. I thought it was perfect for them. For the pudding i just used some shimmery Brown Card stock i had in my stash. The sentiments are from a Christmas Die set by First Edition.

I hope you like them and will give them a try!

Bye for now!

Love Ann xx

Sunday, 27 October 2019

Cards For Men!!

Hi Everyone,
Thank you for stopping by my Blog Today. If you follow me you will no that i don't make any cards/projects for men! I think its because they can be very difficult to make & also i don't have any Men in my life so i tend to just not bother!
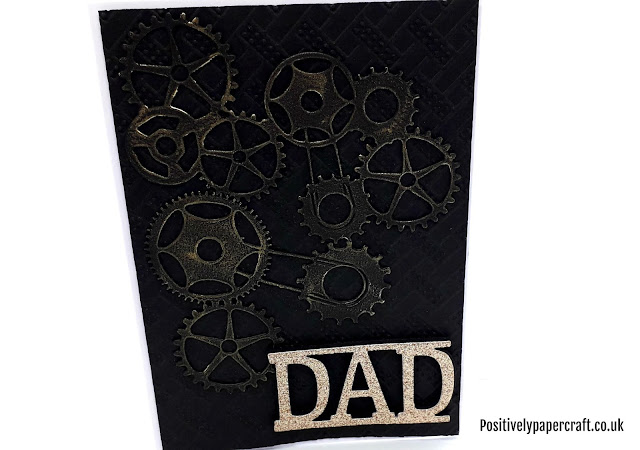
However, today i have the most adorable Men's cards for you! I had so much fun making these, especially the ones with the cute Tools on them. It was quite easy to make these cards and i hope you like what i did.

Men's card ideas


Men's card ideas


Cards for men


Cards for men

All of the cute Dies i used on these cards are from Surprise Creation Store. I really do love there Dies as i find the quality is fantastic as is the price!! Below i have listed all the links to the Dies i used.

MENS COLLECTION BORDER DIES

COGS & GEARS SET

MENS TOOL COLLECTION

MENS FRAME COLLECTION

MENS SENTIMENT WORD DIES

I hope you like the cards i made!!

Love
Ann xx

Beautiful Gilded Hexagonal Gift Box

Hexagon gift box tutorial


Hi everyone!
I hope you are all having a great Weekend! Today i am back with a beautiful gilded hexagonal gift box that is from a Die set by Helen Griffin (Simply made crafts) . These die sets are fantastic as you have lots of different options to make larger or smaller boxes & also different panels to decorate your box.

Hexagon box tutorial, Gilding wax box

The large poinsettia flower on the top of the box is also a Die by Helen. I think it may be sold out at the moment but they will get it back again very soon. Just keep checking the CRAFTSTASH website. I decorated my Box with Silver GILDING WAX & i think it gives it the look of metal & also makes it look like an antique style box.

You can check out my Youtube tutorial to see how you construct the box etc. I will put the link to the video at the end of this Blog post. I also have some more great tutorials lined up for next week using some more of Helen's Fab Die sets. Make sure you follow me on Youtube etc. If you have pets or no someone who does i will be making a really cute project next week :-)

Thank you for stopping by & here is the link for the Hexagon GIFT BOX in case you want to check it out or purchase it.

Until next time.......
Ann xx


Friday, 25 October 2019

*NEW* Card samples!!

positivelypapercraft, Handmade cards


Hi Everyone,
Today i am back with some beautiful card samples that i made using products from RLJLIVES. I mentioned last week on Facebook that i will be posting most of my Design team projects on my Blog now rather than my YouTube channel. This is because i want to do some of my own tutorials on YouTube . I will post some Design team projects on my Channel such as a construction tutorial etc. Like i say though, i want to get back to doing some of my own creations :-)

The cards in the picture above are just adorable!! I love the little handbags! You can choose either  a small or  large handbag. They are very easy to put together & you can have so much fun choosing your colours/decoration etc. Here is the Link for the BAG DIE

Butterfly cards


The next card is this gorgeous Butterfly card. I have shared the Butterfly before but background die is new. I cut mine out in a very pale Teal colour and then layered it onto some brushed silver card. Here are the links for the Butterfly Die & the Background Die


Breast cancer awareness card


I love this Breast Cancer awareness die! I propped mine up with some 3mm craft foam. The large background die is also from RLJLIVES store. I have had this one a while but only got round to using it. Here are the links for the Awareness die & the Large Background Die

I hope you have enjoyed looking at the card samples i made today. I think my favourite die is the handbags!! they are just so sweet and very simple to put together as you only get a few pieces.

Until next time........

Ann xx

Saturday, 19 October 2019

Very Easy Pop-Up Christmas House Card

Easy pop-up cards, positivelypapercraft, easy Christmas cards


Hi Everyone,
Thank you for visiting my Blog today! If you follow me you would of saw the Pop-Up Woodland card that i made the other day. This has been so popular and i just want to say 'Thank you' to everyone who has sent me pictures of their version!! I love seeing your makes! I enjoyed making that card and watching the little scene 'come to life'.
My mind has been ticking away thinking what else i could make using the same concept. I decided on this adorable pop-up House card!! It turned out so cute and its even easier than the Woodland Card!!


No dies are required to make this card. I did use dies for my door and windows but you can easily make your own. I only used them because i had them. The Tree, Ginger bread men, sign and presents are stamps. I stamped them, coloured them in then fussy cut them out. I just left a small tab sized piece of card on the bottom so i could fold it and use it to stand the elements up. You can use whatever stamps you have.

DIMENSIONS

POP UP CARD MEASURES 5 3/4" X 11" 

SCORE IN THE MIDDLE @ 5 1/2" 

MARK THE FOLD LINE 1" FROM EACH SIDE AND MEASURE UP 1" CUT UP BOTH OF THESE PENCIL LINES

CARD BASE MEASURES 6" X 11 1/4" 

SCORE IN THE MIDDLE @ 5 5/8"

CARD FOR THE HOUSE MEASURES  4 5/8" X 5 1/2"

MEASURE DOWN 1 3/4" ON EACH SIDE AND MARK

MEASURE THE MIDDLE OF THE CARD AND JOIN THE PENCIL LINES TO CREATE A POINTY ROOF. CUT WITH SCISSORS


Please  check out my Youtube video for full instructions. I have added the link at the end of this post.

Until next time.....

Ann xx


Tuesday, 15 October 2019

EASY Pop-Up Christmas Card! (Folds Flat)


Hi Everyone
Thank you for popping over to my Blog! Today i have the most adorable Pop-Up card that is so simple to make!! How cute has mine turned out!!! I love it. The longest part of this project was gluing all the pieces on, like the trees and little snowflakes etc. I happily sat and glued away though as i really enjoyed making this card.
My mind was also going crazy with all the different types of decorations i could use. Maybe little Houses and Villages etc. Maybe doing some more stamping and adding paper to the background etc. There are so many different ways you can decorate this card.

Positivelypapercraft, Pop up Christmas card tutorial

Pop up card tutorial, positivelypapercraft
The card folds completely flat for posting.
The dies i used to decorate my card were mainly from Alinacraft. The only ones that wern't were the large sentiment and the small Tree. When you go and watch my Tutorial you will find all the links under the video. Just click 'Show More' on the right hand side or its an arrow if on your Phone /Tablet.

Below i have listed the Dimensions:

RED CARD BASE MEASURES 11 1/2" X 6 1/2" 
SCORE IN THE MIDDLE @ 5 3/4"

WHITE INSIDE CARD MEASURES 11" X 6"
SCORE IN THE MIDDLE @ 5 1/2"

PENCIL MARKS FOR THE POP-UP ARE: 
2 CM OR 3/4" FROM EACH SIDE    -     4.5 CM OR 1 3/4" MEASURING UP

2.5 CM OR 1" FROM EACH SIDE    -    2 CM OR 3/4" MEASURING UP

2 CM OR 3/4" FROM EACH SIDE   -    1.5 CM OR 1/2" MEASURING UP

Please check out my tutorial for full instructions. You can find the link at the end of this post.

Until next time......

Ann xx


Sunday, 13 October 2019

Beautiful Double Folding Shaker Frames

Shaker picture frame tutorial


Hi everyone,
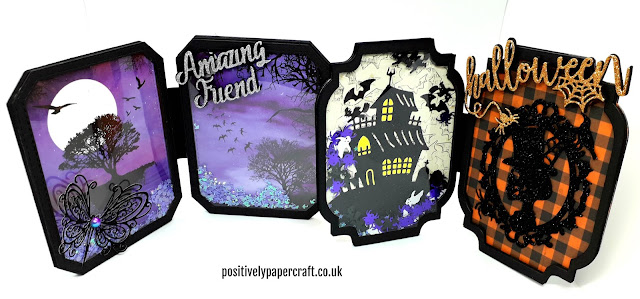
Today i am back with this gorgeous double shaker picture frame. I love this and its really simple to make. It would make a fantastic gift for any occasion so i hope you like it and will give it a try for yourself. I made 2 versions, a Halloween one which i will picture below and this gorgeous Silhouette style. I got the images in a swap but i have been told they are from Hobby craft. Of course you can use whatever you have, Stamps, Photographs, Die cuts etc. I am just giving you the concept and the idea.

Shaker picture frames
Here is a picture of the Halloween one on the right.

I used large Frame dies to make mine but you can use any frame dies that you have. Anything like a circle or rectangle will do. You could even just use a paper trimmer or craft knife to make your own frames so dies are not essential to be honest.

With me using Dies i can not really give measurements as its likely that you will be using different ones to me. I just wanted to give you the idea. This would look fantastic in a Christmas theme!! You could have a Photograph in one side and i lovely Christmas scene in the other with shaker bits.

I will link my You Tube tutorial below so you can pop over and check it out!!

Bye for now

Ann xx


NO DIE EASY Christmas Book Box Tutorial

Faux book box, Christmas eve box,

Hi Everyone,
Today i am back with a a Christmas version of the 'Spooky Spells' Book Box i made. I have had so many requests to make a tutorial so i have. You can find that on my You Tube channel ( The link for that is at the end of this post). As you no the original Book was made in a Halloween theme, i did think when i was making t that it would look great in a Christmas theme.

I really hope you will have a go at making one. I would like to see more people making my projects as i put so much work into them. It gets very disheartening when people don't attempt to make any. You can email me your pics to positivelypapercraft@gmail.com. If you are a member of my Facebook group you can post the pictures on there.

Christmas book box, Faux book box


Halloween treat box, Faux book box
The 'original' Book in a Halloween theme.
As stated in the title, this Book requires no Dies to make the construction. Of course you can use Dies to decorate the final project like i have but you can also use stamps or patterned paper etc. Its so simple to make and it looks adorable. Its very roomy inside and you can fir sweeties or Gifts etc. I suppose you could even use it for Cards & Envelopes.

DIMENSIONS

YOU WILL NEED A 12 X 12" PIECE OF CARD STOCK CUT DOWN TO 10 1/2" X 12"

SCORE ALL 4 SIDES @ 1 1/2" & 3"

1 PIECE OF CARD STOCK FOR THE FRONT OF THE BOOK MEASURING 4 1/2" X 6 1/4"

1 PIECE OF CARD STOCK FOR THE SPINE MEASURING 6 1/8" X 2 1/4"

I love this little Book Box and i will be most definitely making a few more.

Until next time........

Ann xx

Wednesday, 9 October 2019

Large Christmas Cracker Box (holds 6 Crackers)

positively papercraft

Hi Everyone,
Welcome to my Blog!
Today i have a gorgeous Christmas Cracker project for you. This large box holds 6 Crackers and would make a perfect gift for so many people. The crackers are made from a Cracker die but the box i made myself. Of course you don't have to put crackers in the box, i think it would also hold a bottle of Wine and some Chocolates.

Christmas cracker tutorial


Christmas cracker gift box


I thought it would be nice to put an acetate window on the front . You can just use whatever shape dies you like for yours. The box has 2 lids, the bottom one i glued on as i didn't want the crackers falling out. I also made a carry handle from Ribbon.

Please check out my Video tutorial. You can find the link at the end of this post.

Until next time......

Ann xx


Beautiful & Easy Christmas Diorama Cards

White Christmas cards


Hi everyone,
Thank you for stopping by my Blog Today!
I want to share these beautiful Diorama cards with you. I made quite a lot of them and most of them are White, which i think looks so elegant. I think my favourite is the Black & white one. They are very simple to make and you can use most frame die sets. I used a mixture of Ovals &  Rectangles but you could also use Circles & Squares, whatever you prefer.

The Snowy hills are just some Border Dies that i have so you don't need specific 'Scene' Dies, just use what you have. I think they turned out so pretty and the great thing is that these cards fold flat for posting!! Here are some more i made.


I also have a tutorial on Youtube so please check it out. I will put the link below.

Until next time......

Ann xx


Year End Clear out!! Grab Some Bargains