Wednesday 29 January 2020

Another Easel Hat Card With Gorgeous Hat Box!!

Positivelypapercraft easel hat card

Hi Everyone!
Welcome to my Blog & as always, thank you so much for stopping by.  You may remember a few weeks ago i made a beautiful easel Hat/Bonnet card with a presentation gift box. At the time i was trying out different video techniques & that video happened to be sped up & had a voice over. A few people messaged me & asked if i could possibly redo the tutorial in 'real time'. So i have! The other reason i wanted to redo it was because i really wanted to make a mini Hat box to gift the card. I am thrilled with how it turned out & i hope you are to.

Easel Bonnet card & matching hat box


Easel hat card, positivelypapercraft


Handmade cards, positivelypapercraft


This would make a perfect Mothers Day Card. That's what i have decided to use mine for. As you can see in the picture, i die cut the word 'Mam' in silver glitter card. I also added a silver glitter bow on top of the lid. I just love the way this turned out & anyone would be thrilled to receive this. They could also use the hat box as storage afterwards.

It really is a very simple project to make & i have seen so many people re make it. I love seeing people trying my tutorials & ideas. Please feel free to send me any pictures of your creations. You can send them to my email address or via Facebook or Instagram.

Below i will list all the measurements in imperial & metric. You will also find the link to my video at the end of this post.

MEASUREMENTS

CARD
CIRCLE FOR THE CARD BASE IS 5 1/4"    OR    13.3 CM 

LAYERING CIRCLES MEASURE 4 1/2"  &  4"     OR    11.4 CM & 10.2 CM 

PATTERNED PAPER FOR THE HAT MEASURES 9 1/2" X 2" 
SCORE THE SHORT SIDE @ 1/2" & 1 1/2"
OR
24.1 CM X 5 CM 
SCORE THE SHORT SIDE @ 1.2 CM & 3.8 CM 

CIRCLE FOR THE HAT TOP IS 2 3/4"     OR    6.9 CM 

HAT BOX
2 PIECES PATTERNED PAPER MEASURING 3 1/2" X 12 
SCORE BOTH PIECES @ 1/2" ON THE SHORT SIDE & JOIN TOGETHER 
OR
8.8 CM X 30.5 CM 
SCORE THE SHORT SIDE @ 1.2 CM 

CIRCLE FOR THE BOX BASE MEASURES 5 3/4"   OR   14.6 CM 

BOX LID
PATTERNED PAPER X 2 PIECES MEASURE 1 1/2" X 12
SCORE THE SHORT SIDE @ 1/2" ON BOTH PIECES & JOIN TOGETHER 
OR
3.8 CM X 30.5
SCORE @ 1.2 CM 

CIRCLE FOR THE LID MEASURES 6"   OR   15.2 CM 

I hope you enjoyed the tutorial. I will be back on Friday with Colouring Fun Friday.

Bye for now 
Ann xx


Sunday 26 January 2020

Make Your Own Ink Pad Storage!!

Handmade ink pad storage, positivelypapercraft


Hi Everyone,
Thank you for stopping by my Blog Today. I am rather excited about Today's project! Quite a bit of work went into it and i am pleased with the result. Its not perfect but then again its handmade. Its all made from paper pad backing covers/old cereal boxes & anything which resembles chipboard. I doubled up the cereal boxes and also the paper pad backing sheets as i wanted them to be quite thick.

Positivelypapercraft Ink pad storage


My storage unit holds 14 Ink pads. It will not hold Stampin Up pads though. The paper i used to cover it is so beautiful!! Its from Stamperia & its called Wonderland. Of course you can choose whatever you like to decorate yours. I also put some fancy Gold corners on that i have had in my stash for a while. They were glued on with my favourite Super Glue i get from Amazon!
 I love this glue & its the best i have ever used! Once that Glue is on, trust me! Its not coming off again. I will put any links i have for products at the end of this post. I normally just put them under my Youtube videos but i will also put them on here as well.

I am thrilled at how strong this storage unit has turned out. I hope you like it and will give it a go. Just take your time with it and make sure you have everything prepared & ready. As i said in the video, the only thing i was not happy with was the shelf's. Some of them slightly stick out. That is easily rectified if you just cut your slits a little longer. This will allow the shelf's to sit back further into the box.

Please find all the measurements listed below in metric & Imperial:

MEASUREMENTS 

CHIPBOARD SPINE MEASURES 6 7/8" X 4"
OR  17.5 CM X 10.2 CM 

MARK AT EVERY 1" AND THEN MAKE YOUR SLITS ABOUT 1 3/4" LONG

6 CHIPBOARD SHELVES MEASURING 6 1/4" X 4"
OR  10.2 CM X 15.9 CM 

MARK IN THE MIDDLE @ 3 1/8" & MAKE YOUR SLIT ABOUT  2 1/4" LONG

CHIPBOARD X 2 PIECES FOR THE TOP & BOTTOM MEASURING 6 1/2" X 4" 
OR   15.9 CM X 16.5 CM 

DESIGNER PAPER MEASURES 

2 PIECES MEASURING 3 7/8" X 6 3/4" 
OR   17.1 CM X 9.8 CM 

1 PIECES FOR THE TOP MEASURING 3 7/8" X 6 1/4" (OR 2 PIECES IF YOU WANT TO DO THE BOTTOM ALSO) 
OR  9.8 CM X 15.9 CM 

IF YOU WANT TO REINFORCE THE INSIDE CORNERS YOU NEED 4 PIECES OF CARD MEASURING 3 7/8" X 2" 
SCORE ON THE SHORT SIDE @ 1"
OR
4 PIECES MEASURING 9.8 CM X 5 CM
SCORE @ 2.5 CM 

I hope you have enjoyed my tutorial & remember you can find the video and product links below.

Bye for now
Love Ann

LIMETREE CRAFT 220 GSM BLACK CARD


Wednesday 22 January 2020

Make your own professional looking sectioned Box

Positivelypapercraft storage box tutorial


Hi everyone!
Welcome to my Blog & thank you for stopping by to check out today's tutorial.  I am soooo excited about today's project & so proud of it to! I just love the way it turned out & i will be most definitely making more of these. This box is just so cute & the best thing is its super, super strong. I am sure you will love it if you make one or maybe two or three!

I had the idea in my head of those boxes that pop together with fasteners, i think they are made for CD storage but i am not 100% sure. Mine is just for show (the fasteners not the box) & i think it just looks so cool. I made mine to hold my embellishments but you can store whatever you like in yours. Another great thing is this box is sectioned so it has 3 compartments, great to store bits & bobs in it.

My box is made from old cereal boxes that i glued together so my pieces are extra thick. There is no need to go out & buy chipboard. As long as you have some cereal boxes or the backs off 12 x 12 paper pads, your good to go. Make sure you head over to my you tube channel to watch my step by step tutorial. I will put the video link below but i can not do that until the video is 'live'. As i keep saying, please subscribe to my channel and then you will get a notification when my video is published. It then saves you waiting for the video link to be put on here.

I will list all the measurements below in metric & imperial.

MEASUREMENTS 

2 PIECES CHIPBOARD MEASURING 7 1/2" X 5
2 PIECES MEASURING 5 X 4 1/2"
1 PIECES MEASURING 7 1/2 X 4 1/2"

OR  2 PIECES AT 19 CM X 12.7 CM 
2 AT 12.7 CM X 11.4 CM 
1 AT 19 CM X 11.4 CM 

2 X CHIPBOARD DIVIDERS MEASURING 4 1/2 X 4 1/2"
OR  11.4 CM X 11.4 CM 

2 PIECES CARD MEASURING 9 1/2 X 7"
2 PIECES MEASURING 7 X 6 1/2" 
1 PIECE MEASURING 9 1/2 X 6 1/2"

OR 2 AT 24.1 CM X 17.8 CM 
2 AT 17.8 CM X 16.5 CM 
1 AT 24.1 CM X 16.5 CM 

INSIDE PIECES OF CARD MEASURE 7 1/4 X 4 7/8"   X 2 
4 1/4" X 4 7/8"   X2 

OR 18.4 CM X 12.4 CM 
10.8 CM X 12.4 CM 

INSIDE BOTTOM CARD IS 7 1/4 X 4 1/4" 
OR  18.4 CM X 10.8 CM 

CARD FOR SECTIONS MEASURES 6 1/2 X 6 1/2   X2 
OR  16.5 CM X 16.5 CM 

INSIDE CORNER PIECES MEASURING 3 X 4 7/8"  X 4 PIECES 
SCORE ON THE SHORT SIDE @ 1 1/2"

OR  12.4 CM X 7.6 CM 
SCORE ON THE SHORT SIDE @ 3.8 CM 

4 DECORATIVE SIDES MEASURING 5 X 4"
SCORE THE SHORT SIDE @ 1", 2" & 3" ON ALL 4 PIECES 

OR 12.7 CM X 10.2 CM 
SCORE @ 2.5 CM,  5 CM & 7.6 CM 

PATTERNED PAPER MEASURES 7 1/4 X 4 7/8" X 2
4 7/8" X 4 1/4" X 2"

OR 18.4 CM X 12.4 CM 
12.4 CM X 10.8 CM 

I hope you have enjoyed my tutorial and will give this box a go.

I will be back on Friday with Colouring Fun Friday.

Love Ann xxx


Monday 20 January 2020

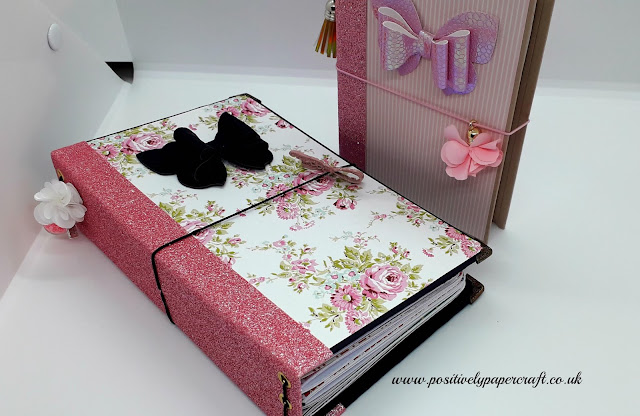
Hardback Travellers Notebook with Handmade Insets (part 2)

Handmade travellers notebook, positivelypapercraft,


Hi everyone,
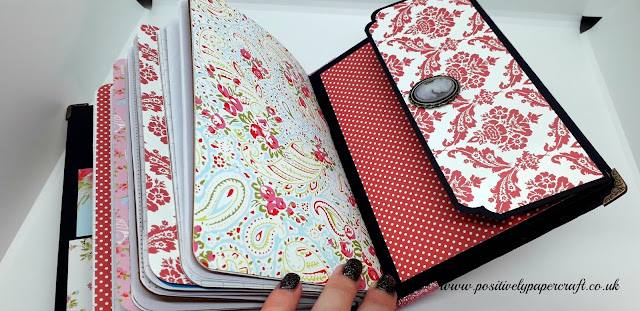
Welcome to my blog and part 2 of my Hardback Travellers Notebook tutorial. I hope you enjoyed PART 1 that i had for you yesterday. Today i am showing you how i made the inserts and also some pockets i made for the inside of the TN. I am just so happy with the handmade notebooks and i very much doubt i will ever buy them again! They are pretty simple to make, you just need a bit of patience lol. Every crafter needs patience though or you would never get anything made!

Easy travellers notebook with inserts, Positivelypapercraft travellers notebook


The great thing about making the notebooks yourself is you can put in whatever you want and decorate it the way you want. In mine i had vellum, foil paper, kraft card and lots more. Like i said in the video i found a great website that allows you to print off all kinds of paper. They have every kind of graph paper you can think of. All you need to do is trim them down to the size you need. I printed mine on copier paper which was 90gsm. I thought it would be better to get one a bit thicker than the normal 75gsm that i use. It gives a much nicer feel etc to your paper.

Positivelypapercraft handmade notebooks


My notebooks are binded together with staples as i have a long arm stapler that i purchased last year from Ebay. I love it and if i remember rightly it was about £12 which i don't think is that expensive. You got hundreds of staples with it to. I have put the link for it under my YouTube video in case you would like to purchase one. However, if you don't have one you can still make the notebooks. All you need is a large needle and some elastic or twine. Basically just sew your pages together. I have tried it and it works really well. Just poke 2 or 3 holes in your books and sew them, then you can tie the twine or elastic on the inside of your book. I used my Xcut corner rounder to round all the corners. I think they look really professional and very neat and tidy.

Below i will list all the measurements for the content covered in today's tutorial. Please click the 'show more' or the small arrow under my youtube video and it will bring up a list of the products i have linked. Its normally a small arrow on the right hand side of the screen if you are on a phone or tablet.

DIMENSIONS 
PAPER FOR THE NOTEBOOKS NEEDS TO MEASURE 9 1/2" X 7 1/2"   
OR   19 CM X 24.1 CM 

PATTERNED PAPER FOR NOTEBOOK COVER NEEDS TO MEASURE 7 1/2" X 10 
OR  19 CM X 25.4 CM 

CARD STOCK FOR FRONT POCKET MEASURES 3 1/2" X 5 1/2" 
SCORE 3 SIDES @ 1/2" 

OR  14 CM X 8.8 CM   SCORE 3 SIDES @ 1.2 CM 
PATTERNED PAPER MEASURES 2 3/4" X 4 3/8"   OR   6.9 CM X 11.1 CM 

CARD STOCK FOR 2ND POCKET MEASURES 5 1/2 X 5 1/2" 
SCORE 3 SIDES @ 1/2" 

OR  14 CM X 14 CM   SCORE 3 SIDES @ 1.2 CM 
PATTERNED PAPER MEASURES 4 3/8" X 4 7/8"   OR   11.1 CM X 12.4 CM 

CARD STOCK FOR BACK POCKET MEASURES 8 1/2" X 5 1/4" 
SCORE 3 SIDES @ 1/2" 
PATTERNED PAPER MEASURES 4 3/8" X 7 1/4" 

OR  21.6 CM X 13.3 CM 
SCORE 3 SIDES @ 1.2 CM 
PATTERNED PAPER MEASURES 11.1 CM X 18.4 CM 

FLAP FOR THE POCKET MEASURES 3 1/2" X 7 1/4" 
SCORE 1 SHORT SIDE @ 1/2" 
PATTERNED PAPER MEASURES 2 3/4" X 7 1/8" 

OR 8.8 CM X 21.6 CM 
SCORE 1 SHORT SIDE @ 1.2 CM 
PATTERNED PAPER MEASURES 6.9 CM X 18.1 CM 


DIMENSIONS FOR SMALLER TRAVELLERS NOTEBOOK

CHIPBOARD X 2 PIECES MEASURING 6 x 4 1/4   OR    15.2 cm x 10.8 cm 
CHIPBOARD SPINE MEASURES 6  x 1 1/4"    OR   15.2 cm x 3.1 cm 

CARDSTOCK MEASURES 8 X 12    OR    20.3 cm x 30.5 cm 

INSIDE CARD MEASURES 9 1/2 x 5 7/8" OR    24.1 cm x 14.9 cm 

PATTERNED PAPER MEASURES 5 3/4" x 4 1/8"  X 2 PIECES 
SPINE PAPER MEASURES 5 3/4" x 1"
OR   14.6 cm x 10.5 cm 
SPINE  14.6 cm x 2.5 cm 

Please find the link to my you tube video at the end of this post.
I will be back on Wednesday with another fab project! Don't MISS IT!

Love Ann xx


Sunday 19 January 2020

Hardback Handmade Travellers Notebook With Inserts (Part 1)

positivelypapercraft travellers notebook


Hi everyone,
Welcome to my Blog!! I am so excited about today's project!! I have been working on it for a couple of days now & i am thrilled at the end result. As you can probably tell from the picture, i have made a small & large Travellers notebook. If you follow me you may no that i have done a few travellers notebooks in the past, however i have never done any made from chipboard. I just love them and i also love making them! I think this is my new addiction.

Positivelypapercraft tutorial


I even made all 4 notebooks in the larger TN. They turned out perfect & i think they look so professional. Making them yourself means that you can add in anything you like! This turned out to be a long tutorial so i decided to split it into 2 parts. Part 1 is the cover and binding etc & part 2 is the notebooks & pockets.  As this is part 1 i will list all the measurements for the cover etc & tomorrow when part 2 comes out, i will list all measurements for the notebooks & pockets etc.

In part 2 i show you a few different options on how you can make your notebooks so i hope you find it helpful. I will never buy another notebook as i am so pleased with the ones i made. The small TN is just so adorable and i had some notebooks lying around that i bought for the last TN i made. It made sense to just use them up. I will also list the measurements in tomorrows post in case you would like to make the smaller version. Its made the same way just smaller.


Below you can find the measurements for the parts i covered in the part 1 video:

MEASUREMENTS 
CHIPBOARD 2 PIECES MEASURING 5 X 8"   OR    12.7 CM X 20.3 CM
1 PIECE MEASURING 8 X 1 3/4"    OR    20.3 CM X 4.4 CM 

2 PIECES 12 X 10 CARD STOCK   JOINED TOGETHER, SCORE 1 PIECE ON THE LONG SIDE AT 1/2" 
OR 25.4 CM X 30.5 CM SCORE AT 1.2 CM 

INSIDE CARD MEASURES 12 X 7 3/4"    OR    30.5 CM X 19.7 CM 

PATTERNED PAPER X 2 MEASURING 4 7/8" X 7 7/8"   OR   12.4 CM X 20 CM
PATTERNED PAPER FOR SPINE MEASURES 7 7/8" X 1 5/8"   OR   20 CM X 4.1 CM 

FABRIC SPINE MEASURES 3 3/4" X 10   OR   9.5 CM 25.4 CM 

You can also find the link to the video tutorial below. Any products i used in this tutorial will be listed under my YouTube video.

I will be back tomorrow with part 2

Love Ann xx


Wednesday 15 January 2020

Gorgeous Notebook Folder

positivelypapercraft notebook folder

Hi Everyone,
Welcome to my Blog & thank you for stopping by.
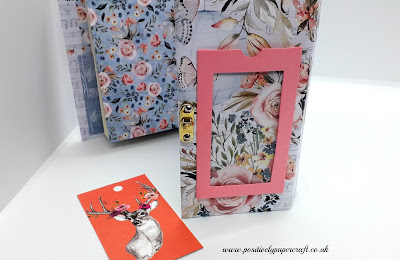
Today i have a lovely Notebook Folder/Organiser that would make a great gift for anyone. I made mine from chipboard but you could also use cereal boxes etc. The paper pad i used is called 7th Heaven from Mintay & its beautiful.

Positivelypapercraft


There is 2 notebooks in the folder which i made myself. Its really easy to do. One has copier paper in & the other is some lined paper i cut from a notepad. I just put the pages together and wiped glue over the top where the papers join. I then clipped them together for about 30 minutes. Give it a try!

positivelypapercraft


On the front of the folder i made a pocket that you could put a photo in or a quote of some sort. I thought it was a nice little feature, I used a die to cut out the window and then put some acetate behind it. The gold closure is also a lovely addition and i picked a pack of them up from Aliexpress.

You can find all the measurements below in Imperial and Metric.

DIMENSIONS

CHIPBOARD MEASURING  6 X5" X 2 PIECES , 6 X 3" X 1 PIECE & 6 X 1" X 2 PIECES   OR
12.7 CM X 15,2 CM,  15.2 CM X 7.6 CM,  15.2 CM X 2.5 CM 

PATTERNED PAPER  12 X 8" & 8 X 6"  SCORE THE LARGEST PIECE @ 1/2" ON THE LONG SIDE OR
20.3 CM X 30.5 CM & 30.5 CM X 15.2 CM

PAPER FOR THE INSIDE MEASURES 3 X  2 X 5 3/4"   1 X  4 X 5 3/4"   1 X 4 1/2" X 5 3/4"  OR
14.6 CM X 5 CM   10.2 CM X 14.6 CM  &  11.4 CM X 14.6 CM 

NOTEBOOK PAPER IS 4" X 5 1/2"   OR    10.2 CM X 14 CM 

NOTEBOOK COVERS ARE 4 1/8" X 6"   OR   10.5 CM X 15.2 CM 

POCKETS ARE 4 3/4" X 3  X 2 PIECES    OR    7.6 CM X 12.1 CM 

FRONT POCKET MEASURES 4 1/2" X 3"
SCORE 3 SIDES @ 1/4" 
OR  11.4 CM X 7.6 CM   SCORE 3 SIDES @ 0.6 CM 


I hope you have enjoyed Today's tutorial. You can find the link to my video at the end of this post.

I will be back on Friday with Colouring Fun Friday 3

Bye for now

Ann xx


Sunday 12 January 2020

Beautiful Accordion Tag Mini Album

No dies accordion album, positivelypapercraft


Hi Everyone,
I hope you are all well and have had a lovely Weekend! I am back today with a really beautiful accordion tag mini album. I have seen these around and always wanted to make one. I am so pleased i got to as they are so pretty. I did not follow a tutorial for this, i just made up my own dimensions etc.

positivelypapercraft


Positivelypapercraft


Positivelypapercraft


Please do not think that this album is hard or complicated! It really isn't. Plus if you follow my tutorial you should be able to make one as i always include step by step instructions. It does take time as you have quite a lot of pockets and mats to make etc. Its so worth the time though as it just looks so classy and elegant. 

I manged to make mine out of A4 card stock. You could always make a bigger version to which i think would love beautiful. 
Please find all the measurements below including metric measurements. 

MEASUREMENTS 

2 PIECES OF CARD FOR THE SIDES, SCORE AND FOLD BOTH THE SAME 9 1/2" X 8 1/4"
OR    24.1 CM X 21 CM

SCORE ALL 4 SIDES @ 1 & 2"
OR   5 CM & 2.5 CM

14 PIECES OF CARD FOR YOUR POCKETS MEASURING 11" X 4 1/2"
OR   11.4 CM X 27.9 CM 

SCORE THE LONG SIDE @ 5 1/4" & 10 1/2"
SCORE THE SHORT @ 4"
OR   13.3 CM & 26.7 CM  AND SHORT SIDE @ 10.2 CM

10 PHOTO MATS MEASURING 4 3/8" X 3 3/4"
OR  9.5 CM X 12.1 

PATTERNED PAPER 
2 PIECES MEASURING 4 X 5 1/4"    OR   10.2 CM X 13.3 CM

4 STRIPS MEASURING 4 1/8" X 3/4"   OR   10.5 CM X  1.9 CM

2 STRIPS MEASURING 5 3/8" X 3/4"   OR   13.7 CM  X 1.9 CM

PAPER FOR MATS X 10 PIECES MEASURING 4 3/4" X 3 5/8"  OR   12.1 CM X 9.2 CM

Please find the link to my tutorial listed below. You can also find the links to any products i used under the video in the description. 

I will be back very soon with another tutorial.

Love Ann xx


Sunday 5 January 2020

NO DIE Hexagon Stepper Box Tutorial

positivelypapercraft, Easy gift box tutorial,


Hi Everyone,
Welcome to my Blog & thank you for stopping by!! You may remember i did a tutorial on a balcony/stepper box a while ago on my channel. It was a die by simply made crafts but lots of people asked me if i could do a tutorial on a similar box without using a die. So here it is! My stepper box has 3 little hexagon boxes inside and its really quite a large box overall.

Balcony box tutorial, positivelypapercraft,


You can see what the inside looks like from the picture above. Its a really easy box to make and it looks and feels very professional. I hope you will have a go at one yourself. I stated in my video that you could add some more boxes inside, however you can't as they have nowhere to fold in it. Have no idea what i was even thinking of lol.

I will list all the measurements below in Imperial and metric. I used very thick card for my box, at least 300gsm, maybe more as its so thick! I did say in the video that it may be possible your lid does not fit unless you are using very thick card like me. So as promised i will also give you measurements for a slightly smaller lid just in case.

MEASUREMENTS

CARD FOR INSIDE HEXAGON BOXES MEASURES 4" X 11 3/4"   OR    10.2 CM X 29.8 CM

SCORE THE LONG SIDE @ 1 7/8,  3 3/4",  5 5/8,  7 1/2,  9 3/8 & 11 1/4"
OR  4.7 CM,  9.5 CM,  14.2 CM,  19 CM,  23.8 CM  &  28.5 CM

SCORE HE SHORT SIDE @ 2"    OR    5 CM

PATTERNED PAPER FOR THE INSIDE HEXAGON BOXES MEASURE 1 3/4" X 1 7/8"
OR   4.4 CM X 4.7 CM YOU NEED 15 PIECES 

CARD FOR THE BOX MEASURES 10 3/8 X 8 1/4"
OR   20.9 CM X 26.3 CM 

SCORE THE LONG SIDE @ 2, 4,  6,  8  &  10"
OR   5 CM,  10.1 CM,   15.2 CM,  20.3 CM  &  25.4 CM 

2ND PIECE OF CARD FOR THE BOX MEASURES 8 1/4" X 6"
OR  20.9 CM X 15.2 CM

SCORE THE SHORT SIDE @ 2" & 4"
OR  5 CM & 10.1 CM

PATTERNED PAPER FOR THE BOX MEASURES 1 3/4" X 8"  YOU NEED 8 PIECES
OR  4.4 CM X 20.3 CM 

CARD FOR THE LID MEASURES 11 X 4 1/2"
OR  11.4 CM X 27.9 CM 

SCORE THE LONG SIDE @ 2 1/8,  4 1/4,  6 3/8,  8 1/2 & 10 5/8"
OR  5.3 CM,  10.7 CM,  16.1 CM,  21.5 CM & 27 CM 

SCORE THE SHORT SIDE @ 2"    OR    5 CM

SMALL PIECE OF CARD FOR THE LID MEASURES 2 1/2" X 4 1/2"
OR  6.3 CM X 11.4 CM 

SCORE THE SHORT SIDE AND LONG SIDE @ 2"    OR    5CM 

MEASUREMENT FOR SMALLER SIZE LID
CARD MEASURES 12 X 4"    OR    10.1 CM X 30.4 CM 

SCORE THE LONG SIDE @ 2,, 4,  6,  8 & 10"   OR    5 CM,  10.1 CM,  15.2 CM,  20.3 CM & 25.4 CM

SCORE THE SHORT SIDE @ 2"    OR    5CM

SMALL PIECE OF CARD MEASURES 2 X 1"    OR    5 CM X 2.5 CM 

SCORE THE SHORT SIDE @ 1/2"    OR    1.2 CM 

you can also find the link to my video at the end of this post.

Bye for now

Ann xx


Wednesday 1 January 2020

EASY Travellers Notebook Tutorial Part 1

Easy travellers notebook tutorial


Hi everyone,
First i just want to wish you all a very happy new year. I hope you all have a healthy, happy and crafty new year.
I want to kick the new year off with a Travellers Notebook tutorial. Its really easy to make and the video is a bit long. Thats only because i wanted to explain it all step by step.  I also make some storage wallets and envelopes for it.

Positivelypapercraft Travellers notebook tutorial


positivelypapercraft


Positivelypapercraft


I have put the links in my you tube video description for the notebooks that i came across on Amazon. They are only about £4.50 for a pack of 10 and you can get them with narrow lines, wide lines, blank and a grid layout. I made my blank note books using copier paper. It is very simple to do but you will need a long arm stapler if you want to do it this way.

I made my Travellers note book the same size as the one that Gemma sent me. The only problem is that the notebooks that Gemma used were a  bit larger than mine. It just means that my cover is a little large for the notebooks. As i said in the video tutorial, i will also put measurements for a smaller cover which fits the notebooks better. Please bare in mind that if you make the cover the smaller size, the envelope on the back cover will be to big and also the pockets on the front inside cover. You would have to make them smaller.

MEASUREMENTS 
                                
PATTERNED PAPER FOR THE COVER MEASURES 11 5/8" X 8 1/2"    OR    29.5 CM X 21.5 CM

SCORE THE LONG SIDE @ 5 1/4",  5 5/8",  6" & 6 3/8"     OR    13.3 CM,  14.2 CM,  15.2 CM & 16.1 CM

COVERS FOR THE NOTEBOOKS MEASURE 8 1/4" X 8"    OR    20.3 CM X 21 CM

SCORE ON THE LONG SIDE @ 4 1/8"    OR    10.4 CM

ENVELOPE FOR THE BACK COVER MEASURES 10 1/4" X 10 1/4"   OR    26 CM X 26 CM

PUNCH AND SCORE @ 4"    OR    10.1 CM USING THE ENVELOPE PUNCH BOARD 

CARD FOR THE POCKET DIVIDER MEASURES 8 5/8" X 8"   OR   20.3 CM  X 21.9 CM

SCORE THE LONG SIDE @ 4 1/8" & 4 1/2"    OR    10.4 CM & 11.4 CM 

SMALL INSIDE FLAP MEASURES 4 1/4" X 6 3/8"    OR   10.7 CM X 16.1 CM
SCORE ONE OF THE LONG SIDES @ 1/2" AND ALSO HE SHORT SIDE @ 1/2"    OR    1.2 CM

ENVELOPE TO FIT THE POCKET DIVIDER MEASURES 8 1/2" X 7 3/4"   OR   21.5 CM X 19.6 CM

SCORE THE SHORT SIDE @ 1/2" EACH SIDE     OR    1.2 CM

SCORE THE LONG SIDE @ 1 1/2" & 5"    OR    3.8 CM & 12.7 CM

CARD FOR THE 2 FRONT POCKETS MEASURE 6 X 5 1/2"    OR    15.2 CM X 13.9 CM

SCORE BOTH LONG SIDES @ 1/2"  AND THE SHORT SIDE @ 1/2"    OR    1.2 CM

2ND PIECE IS 3 X 5 1/2"   OR    7.6 CM X 13.9 CM   SCORE BOTH LONG ENDS @ 1/2" AND ONE SHORT SIDE @ 1/2    OR    1.2 CM

MEASUREMENT IF YOU WANT TO MAKE THE COVER SMALLER 

8 1/2" X 10"     OR     21.5 CM X 25.4 CM 

Please find the link for my video below.

I will be back with part 2 tomorrow

Bye for now

Ann xx


Year End Clear out!! Grab Some Bargains