Gorgeous Flip Top Mini Album
Hi Crafter's!!
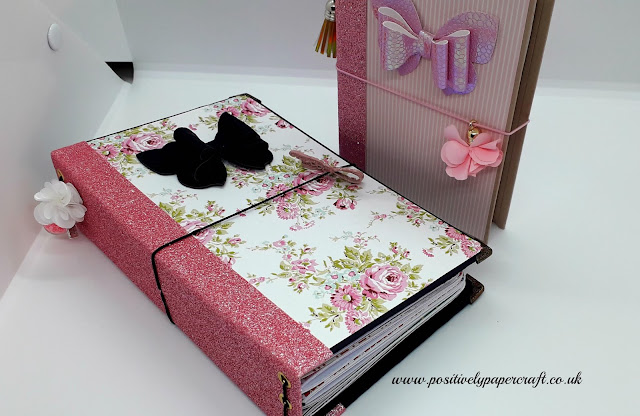
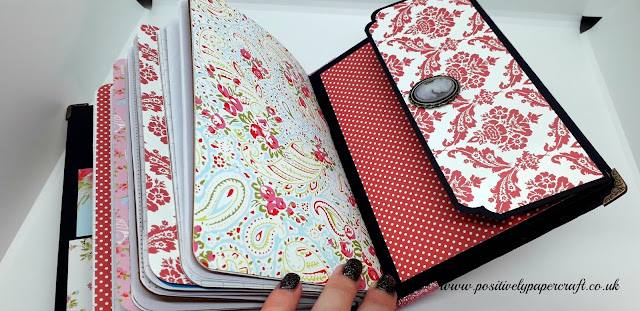
I am back with a gorgeous Flip Top Mini Album!! I have had this idea in my head for a couple of weeks now & thankfully i finally got round to making it. I am thrilled with how it turned out and its really not hard to make. It does take a bit of time but thats the way it is with Mini Albums. I hope you like it and will give it a go yourself. This would make a perfect gift for anyone!!
Please make sure to check out my Step by Step Youtube Tutorial. You can find the link at the end of this post. I will also list all of the dimensions below.
DIMENSIONS
CHIPBOARD X 2 MEASURING 4 1/4" X 6"
CHIPBOARD X 2 MEASURING 4 1/4" X 1 3/8"
CHIPBOARD X 1 MEASURING 4 1/4" X 1 5/8"
CARD FOR POCKETS
X 8 PIECES MEASURING 5 1/2" X 8 1/4"
SCORE THE LONG SIDE @ 4" & 8"
SCORE THE SHORT SIDE @ 5"
CARD FOR THE HINGE SYSTEM
4 PIECES, 1 MEASURING 2 X 4"
1 MEASURING 1 3/4" X 4"
1 MEASURING 1 1/2" X 4"
1 MEASURING 1 1/4" X 4"
SCORE ALL PIECES @ 1/2" ON EACH SIDE
DESIGNER PAPER
11 1/2" X 6 1/4"
8" X 6 1/4"
I hope you have enjoyed my tutorial and i will be back with another one on Friday!
Bye for now.
Love
Ann xx
NO Chipboard EASY Mini Album (featuring Alinacraft products)
Hi Everyone,
Today i have a gorgeous mini album for you. One of the great things about this album is that it requires NO chipboard! Of course you can make it with chipboard if you prefer. The choice is yours. The other great thing is that the pages are made using cards. The album you see in the picture is made using 6 x 6" cards. I am thrilled how this turned out and you can make it any size, depending on what size cards you have.
As i mentioned in my Youtube video, i can not take credit for this Album. I came across it on a channel called Dawns inspirations. . You can find the link to her channel in my Youtube video description. I new as soon as i saw it i had to make one! I am so glad i did.
To make my photo mats i used the Postage stamp dies from Alinacraft store. If you go to my Youtube video you will find all the product links in the description.
DIMENSIONS
12 CARDS MEASURING 6 X 6"
CUT ONE OF THE SIDES DOWN BY 2" DO THIS ON ALL CARDS
12 PIECES OF CARD MEASURING 6 X 2 1/2"
2 X CARD FOR THE COVER BOTH MEASURING 6 X 6 1/8"
1 X CARD FOR THE SPINE MEASURING 6 X 2 3/4"
SCORE BOTH ENDS @ 1/2"
1 X CARD MEASURING 2 1/2" X 6"
1 X CARD MEASURING 2 X 6"
1 X CARD MEASURING 1/2" X 6"
SCORE ALL 3 PIECES @ 1/2" ON BOTH SIDES
DSP FOR THE COVER MEASURES 5 7/8" X 6" X 2 PIECES
DSP FOR SPINE MEASURES 5 7/8" X 2 1/8"
DSP FOR PAGES/CARDS MEASURE 5 5/8" X 3 3/4" X 2
DSP FOR PAGES/CARDS MEASURES 5 5/8" X 2 3/8"
Please make sure to check out my Youtube tutorial for full instructions. You can find the link at the end of this post.
Until Friday......
Bye for now xx
Gorgeous Envelope Gift Book/Pocket Album
Hi Everyone,
Welcome to my Blog and thank you for popping by!!
I wanted to share my latest project with you which i made as some happy mail. The idea is that you load the little envelopes up with crafty bits and pieces! How sweet is that?? perfect for your crafty friends.
I made 2 of these gorgeous little envelope books. A Christmas one and a non Christmas one. For the Festive book i used the stunning Joyous Noel Designer paper. I think this paper is my new favourite! It is absolutely beautiful.
This sweet little book is really easy to make and of course you can choose to make it in any style and design you wish. I also made my own cute little notebook which i put in the Christmas version. I will do a tutorial on this if anyone is interested. Its so easy to make.
As well as envelopes i also put a ribbon sampler in. Some of my envelopes were made from vellum and they all have a Velcro closure. I am so pleased with this little project and i think they make great little gifts.
DIMENSIONS
2 X CHIPBOARD/THICK CARD MEASURING 4 1/2" X 3"
2 X DESIGNER PAPER TO COVER THE CHIPBOARD MEASURING 6 1/2" X 5"
SCORE ALL 4 SIDES @ 1"
2 X DESIGNER PAPER FOR INSIDE COVERS 4 1/4" X 2 3/4"
DESIGNER PAPER OR VELLUM FOR ENVELOPES MEASURES 5 3/4" X 5 1/2"
SCORE THE LONG SIDE @ 1 3/8" & 4 1/8"
SCORE THE SHORT SIDE @ 1/2" & 4 1/2"
Please check out my YouTube tutorial for full instructions. You can find a link to the video at the end of this post.
Until next time......
Bye for now
Ann xx
Hardback Handmade Travellers Notebook With Inserts (Part 1)
Hi everyone,
Welcome to my Blog!! I am so excited about today's project!! I have been working on it for a couple of days now & i am thrilled at the end result. As you can probably tell from the picture, i have made a small & large Travellers notebook. If you follow me you may no that i have done a few travellers notebooks in the past, however i have never done any made from chipboard. I just love them and i also love making them! I think this is my new addiction.
I even made all 4 notebooks in the larger TN. They turned out perfect & i think they look so professional. Making them yourself means that you can add in anything you like! This turned out to be a long tutorial so i decided to split it into 2 parts. Part 1 is the cover and binding etc & part 2 is the notebooks & pockets. As this is part 1 i will list all the measurements for the cover etc & tomorrow when part 2 comes out, i will list all measurements for the notebooks & pockets etc.
In part 2 i show you a few different options on how you can make your notebooks so i hope you find it helpful. I will never buy another notebook as i am so pleased with the ones i made. The small TN is just so adorable and i had some notebooks lying around that i bought for the last TN i made. It made sense to just use them up. I will also list the measurements in tomorrows post in case you would like to make the smaller version. Its made the same way just smaller.
Below you can find the measurements for the parts i covered in the part 1 video:
MEASUREMENTS
CHIPBOARD 2 PIECES MEASURING 5 X 8" OR 12.7 CM X 20.3 CM
1 PIECE MEASURING 8 X 1 3/4" OR 20.3 CM X 4.4 CM
2 PIECES 12 X 10 CARD STOCK JOINED TOGETHER, SCORE 1 PIECE ON THE LONG SIDE AT 1/2"
OR 25.4 CM X 30.5 CM SCORE AT 1.2 CM
INSIDE CARD MEASURES 12 X 7 3/4" OR 30.5 CM X 19.7 CM
PATTERNED PAPER X 2 MEASURING 4 7/8" X 7 7/8" OR 12.4 CM X 20 CM
PATTERNED PAPER FOR SPINE MEASURES 7 7/8" X 1 5/8" OR 20 CM X 4.1 CM
FABRIC SPINE MEASURES 3 3/4" X 10 OR 9.5 CM 25.4 CM
You can also find the link to the video tutorial below. Any products i used in this tutorial will be listed under my YouTube video.
I will be back tomorrow with part 2
Love Ann xx
Hardback Travellers Notebook with Handmade Insets (part 2)
Hi everyone,
Welcome to my blog and part 2 of my Hardback Travellers Notebook tutorial. I hope you enjoyed PART 1 that i had for you yesterday. Today i am showing you how i made the inserts and also some pockets i made for the inside of the TN. I am just so happy with the handmade notebooks and i very much doubt i will ever buy them again! They are pretty simple to make, you just need a bit of patience lol. Every crafter needs patience though or you would never get anything made!
The great thing about making the notebooks yourself is you can put in whatever you want and decorate it the way you want. In mine i had vellum, foil paper, kraft card and lots more. Like i said in the video i found a great website that allows you to print off all kinds of paper. They have every kind of graph paper you can think of. All you need to do is trim them down to the size you need. I printed mine on copier paper which was 90gsm. I thought it would be better to get one a bit thicker than the normal 75gsm that i use. It gives a much nicer feel etc to your paper.
My notebooks are binded together with staples as i have a long arm stapler that i purchased last year from Ebay. I love it and if i remember rightly it was about £12 which i don't think is that expensive. You got hundreds of staples with it to. I have put the link for it under my YouTube video in case you would like to purchase one. However, if you don't have one you can still make the notebooks. All you need is a large needle and some elastic or twine. Basically just sew your pages together. I have tried it and it works really well. Just poke 2 or 3 holes in your books and sew them, then you can tie the twine or elastic on the inside of your book. I used my Xcut corner rounder to round all the corners. I think they look really professional and very neat and tidy.
Below i will list all the measurements for the content covered in today's tutorial. Please click the 'show more' or the small arrow under my youtube video and it will bring up a list of the products i have linked. Its normally a small arrow on the right hand side of the screen if you are on a phone or tablet.
DIMENSIONS
PAPER FOR THE NOTEBOOKS NEEDS TO MEASURE 9 1/2" X 7 1/2"
OR 19 CM X 24.1 CM
PATTERNED PAPER FOR NOTEBOOK COVER NEEDS TO MEASURE 7 1/2" X 10
OR 19 CM X 25.4 CM
CARD STOCK FOR FRONT POCKET MEASURES 3 1/2" X 5 1/2"
SCORE 3 SIDES @ 1/2"
OR 14 CM X 8.8 CM SCORE 3 SIDES @ 1.2 CM
PATTERNED PAPER MEASURES 2 3/4" X 4 3/8" OR 6.9 CM X 11.1 CM
CARD STOCK FOR 2ND POCKET MEASURES 5 1/2 X 5 1/2"
SCORE 3 SIDES @ 1/2"
OR 14 CM X 14 CM SCORE 3 SIDES @ 1.2 CM
PATTERNED PAPER MEASURES 4 3/8" X 4 7/8" OR 11.1 CM X 12.4 CM
CARD STOCK FOR BACK POCKET MEASURES 8 1/2" X 5 1/4"
SCORE 3 SIDES @ 1/2"
PATTERNED PAPER MEASURES 4 3/8" X 7 1/4"
OR 21.6 CM X 13.3 CM
SCORE 3 SIDES @ 1.2 CM
PATTERNED PAPER MEASURES 11.1 CM X 18.4 CM
FLAP FOR THE POCKET MEASURES 3 1/2" X 7 1/4"
SCORE 1 SHORT SIDE @ 1/2"
PATTERNED PAPER MEASURES 2 3/4" X 7 1/8"
OR 8.8 CM X 21.6 CM
SCORE 1 SHORT SIDE @ 1.2 CM
PATTERNED PAPER MEASURES 6.9 CM X 18.1 CM
DIMENSIONS FOR SMALLER TRAVELLERS NOTEBOOK
CHIPBOARD X 2 PIECES MEASURING 6 x 4 1/4 OR 15.2 cm x 10.8 cm
CHIPBOARD SPINE MEASURES 6 x 1 1/4" OR 15.2 cm x 3.1 cm
CARDSTOCK MEASURES 8 X 12 OR 20.3 cm x 30.5 cm
INSIDE CARD MEASURES 9 1/2 x 5 7/8" OR 24.1 cm x 14.9 cm
PATTERNED PAPER MEASURES 5 3/4" x 4 1/8" X 2 PIECES
SPINE PAPER MEASURES 5 3/4" x 1"
OR 14.6 cm x 10.5 cm
SPINE 14.6 cm x 2.5 cm
Please find the link to my you tube video at the end of this post.
I will be back on Wednesday with another fab project! Don't MISS IT!
Love Ann xx
Gorgeous Notebook Folder
Hi Everyone,
Welcome to my Blog & thank you for stopping by.
Today i have a lovely Notebook Folder/Organiser that would make a great gift for anyone. I made mine from chipboard but you could also use cereal boxes etc. The paper pad i used is called 7th Heaven from Mintay & its beautiful.
There is 2 notebooks in the folder which i made myself. Its really easy to do. One has copier paper in & the other is some lined paper i cut from a notepad. I just put the pages together and wiped glue over the top where the papers join. I then clipped them together for about 30 minutes. Give it a try!
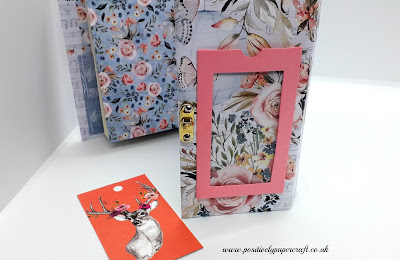
On the front of the folder i made a pocket that you could put a photo in or a quote of some sort. I thought it was a nice little feature, I used a die to cut out the window and then put some acetate behind it. The gold closure is also a lovely addition and i picked a pack of them up from Aliexpress.
You can find all the measurements below in Imperial and Metric.
DIMENSIONS
CHIPBOARD MEASURING 6 X5" X 2 PIECES , 6 X 3" X 1 PIECE & 6 X 1" X 2 PIECES OR
12.7 CM X 15,2 CM, 15.2 CM X 7.6 CM, 15.2 CM X 2.5 CM
PATTERNED PAPER 12 X 8" & 8 X 6" SCORE THE LARGEST PIECE @ 1/2" ON THE LONG SIDE OR
20.3 CM X 30.5 CM & 30.5 CM X 15.2 CM
PAPER FOR THE INSIDE MEASURES 3 X 2 X 5 3/4" 1 X 4 X 5 3/4" 1 X 4 1/2" X 5 3/4" OR
14.6 CM X 5 CM 10.2 CM X 14.6 CM & 11.4 CM X 14.6 CM
NOTEBOOK PAPER IS 4" X 5 1/2" OR 10.2 CM X 14 CM
NOTEBOOK COVERS ARE 4 1/8" X 6" OR 10.5 CM X 15.2 CM
POCKETS ARE 4 3/4" X 3 X 2 PIECES OR 7.6 CM X 12.1 CM
FRONT POCKET MEASURES 4 1/2" X 3"
SCORE 3 SIDES @ 1/4"
OR 11.4 CM X 7.6 CM SCORE 3 SIDES @ 0.6 CM
I hope you have enjoyed Today's tutorial. You can find the link to my video at the end of this post.
I will be back on Friday with Colouring Fun Friday 3
Bye for now
Ann xx
Beautiful Accordion Tag Mini Album
Hi Everyone,
I hope you are all well and have had a lovely Weekend! I am back today with a really beautiful accordion tag mini album. I have seen these around and always wanted to make one. I am so pleased i got to as they are so pretty. I did not follow a tutorial for this, i just made up my own dimensions etc.
 |
I manged to make mine out of A4 card stock. You could always make a bigger version to which i think would love beautiful.
Please find all the measurements below including metric measurements.
MEASUREMENTS
2 PIECES OF CARD FOR THE SIDES, SCORE AND FOLD BOTH THE SAME 9 1/2" X 8 1/4"
OR 24.1 CM X 21 CM
SCORE ALL 4 SIDES @ 1 & 2"
OR 5 CM & 2.5 CM
14 PIECES OF CARD FOR YOUR POCKETS MEASURING 11" X 4 1/2"
OR 11.4 CM X 27.9 CM
SCORE THE LONG SIDE @ 5 1/4" & 10 1/2"
SCORE THE SHORT @ 4"
OR 13.3 CM & 26.7 CM AND SHORT SIDE @ 10.2 CM
10 PHOTO MATS MEASURING 4 3/8" X 3 3/4"
OR 9.5 CM X 12.1
PATTERNED PAPER
2 PIECES MEASURING 4 X 5 1/4" OR 10.2 CM X 13.3 CM
4 STRIPS MEASURING 4 1/8" X 3/4" OR 10.5 CM X 1.9 CM
2 STRIPS MEASURING 5 3/8" X 3/4" OR 13.7 CM X 1.9 CM
PAPER FOR MATS X 10 PIECES MEASURING 4 3/4" X 3 5/8" OR 12.1 CM X 9.2 CM
Please find the link to my tutorial listed below. You can also find the links to any products i used under the video in the description.
I will be back very soon with another tutorial.
Love Ann xx


Ann, I just love you videos, keep up the great work, and Thanks
ReplyDeletejust love all the projects, you are very talented. Thank you for sharing
ReplyDelete