Hi Everyone,
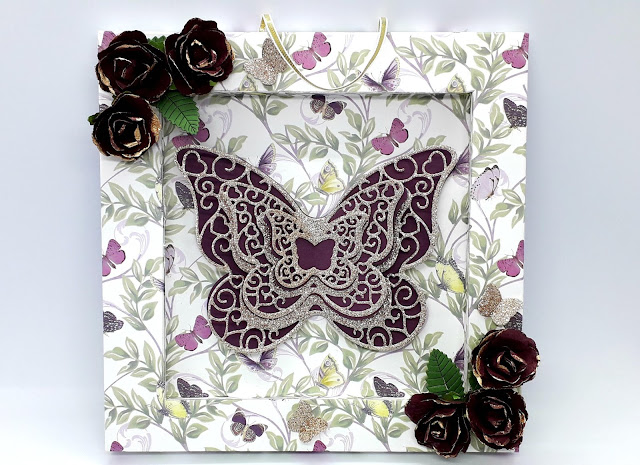
I am back with a gorgeous shadow box tutorial Today!! I promised last week that i would do a tutorial after i shared my Inlovearts projects with you. I no lots of you were keen to see it so here it is! I LOVE the way this has turned out! Its gorgeous and i hung it straight up on my craft room wall. Its such a good size and it would look beautiful if you made 3 and hung there together.
I love this way of making a shadow box as the great thing is the size! This is a whopping 8 x 8" and you could even make it 10 x 10" if you want to. I attached some gold ribbon to the back so you can hang it on the wall. This would make a beautiful gift and i no for a fact i will be making more!
It really is quite simple to make and i show you in the tutorial what templates you need, the great thing is you will always have them so you can make one anytime you fancy.
DIMENSIONS
DESIGNER PAPER MEASURING 10 X 10"
SCORE ALL 4 SIDES @ 1/2" & 1"
DESIGNER PAPER MEASURING 7 X 7"
SCORE ALL 4 SIDES @ 1/2"
CARDSTOCK FOR THE BACK MEASURING 7 7/8" X 7 7/8"
1 TEMPLATE MEASURING 5 7/8" X 5 7/8"
1 TEMPLATE MEASURING 4 7/8" X 4 7/8"
The designer paper i used for this project is called Mariposa by First Edition. It is so beautiful! I picked mine up from Amazon. The butterfly is Alinacrafts new one and i have made a few projects with this die already.
Remember to check out my tutorial! You can find the link at the end of this post.
Until next time......
Bye for now
Love
Ann xx


Oh Ann, this is a beautiful shadow box. I just love it. Gotta give this one a try for sure. That paper is my favorite color as well!!!! That butterfly is huge! Gorgeous, all the way around......TYFS
ReplyDeleteHi Ann, beautiful project. Would you have a link for the leaf die please? I couldn't find it on AliExpress. Thank you.
ReplyDeleteAnn: How can I find the references to order the dies?
ReplyDelete